
I decided to make a centralized page with all the recipes of my own and of other people that I use for my annual Halloween party. Some of the are extremely simple using store bought things and dressing them up, some are pretty complicated and require time and a little skill in the kitchen. I hope some of them come in handy for someone!
My absolute favorite thing to cook is cheesecake. I make several for the "other" big holiday (one to keep, the rest to give away to family and friends) and a few throughout the year for special occasions, like Easter and big parties. I've had people beg me to make them for them, offer to pay for them...etc. I started off making them from recipes about 10 years or so ago, then just kinda of combined all those recipes into my own recipe that works the best for me. I don't like pumpkin cheesecake, so this is kind of how I get a little festive spin on it. This is the basic recipe:
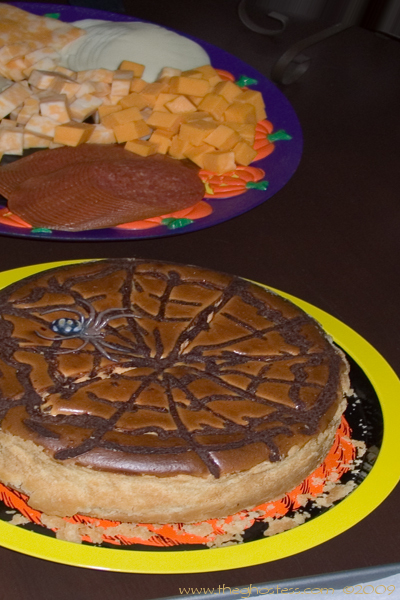
Now, for Halloween (or when I want something with some extra flavor) I add chocolate to it. I used to just mix in cocoa powder with some of the cream cheese mixture and give it a marble blend... but now I've learned the joys of GANACHE! I just mix up a small batch of ganache (or use the extra leftover from other projects) and coat the bottom of the crust before I put in the cream cheese mixture. After I pour in the cake mixture, I drizzle more ganache on top in a spiral starting in the center of the batter and moving out toward the edge. Then I take a butter knife and pull it through the top of the batter from the center outward to create a spiderweb design. Then I bake as usual. It adds just the right amount of rich chocolate to an already rich cake and makes a nice Halloween-ish design. I add a little spider to the top (or you could make some of Britta's spiders) and it's a good-looking dessert. |
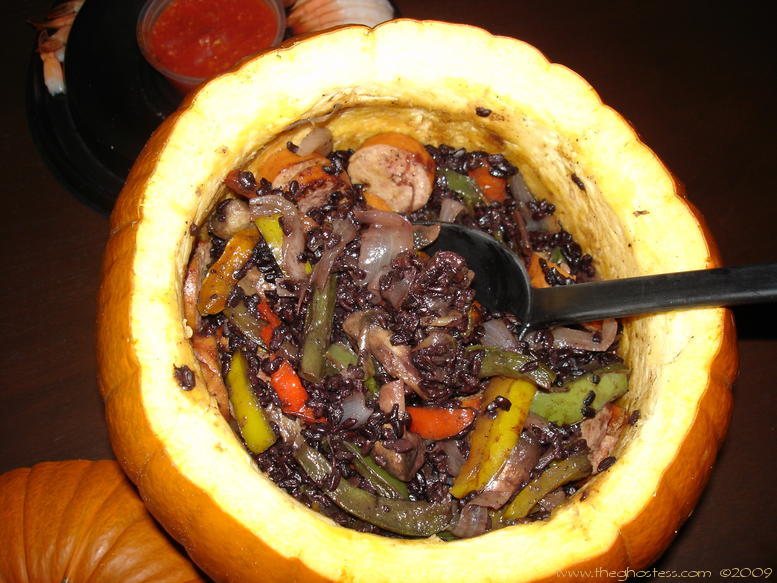
Every year, I try to add something new. In 2007 during the summer, I was playing around in the kitchen, and came up with a pretty decent little concoction made from beef sausage and fresh veggies on a bed of wild rice. I thought it would be a good dish to serve up for the party since it was really easy to make. This is the simple family dinner size recipe, you can double or triple as needed for parties. Sliced Snake and Veggies over Maggots
The black rice in 2008 looked like bugs. Too bad I forgot to salt the water before cooking the rice, it ended up bland. Gotta remember that for next year. I think I'll mix half black rice with the usual wild rice I use.
|
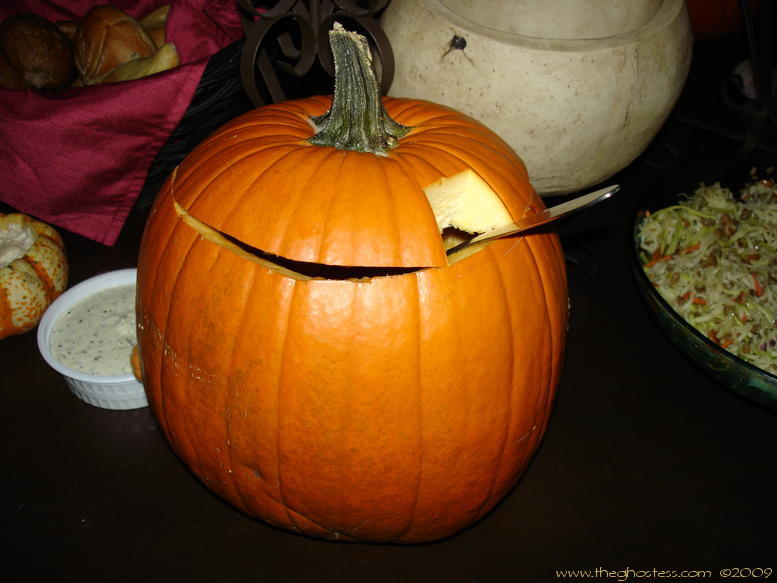
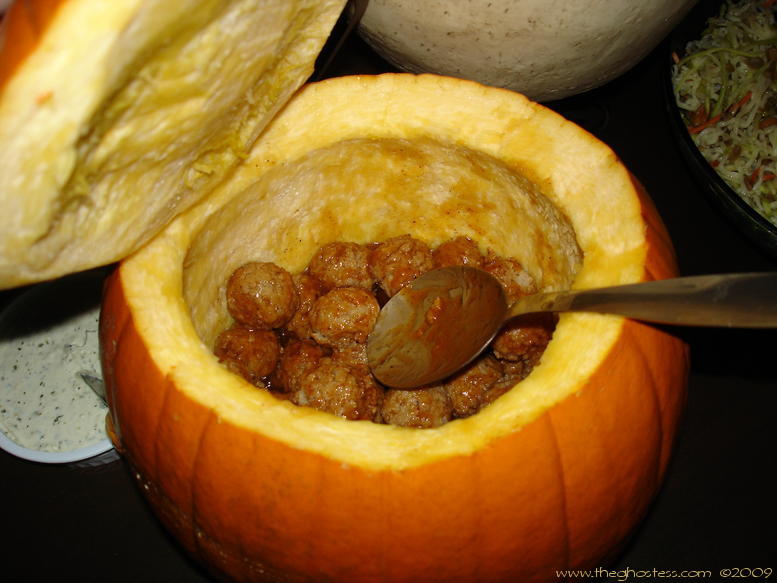
One thing I like to do for serving dishes, is to use real pumpkins. The large ones can be cleaned and gutted as you would for carving, but without cutting a face out for a Jack O' Lantern. I cut a notch in the pumpkin's "lid" for a serving spoon to stick out and the stem makes a good pot handle to lift the lid off. You can put pretty much anything inside that you would normally use a pot or large bowl for. I use them for my meatballs every year.
When the party is over, I just wash them out, scrape out the insides again, then put them in the refrigerator until Halloween, when I carve them as usual. This way, they get to serve double duty!
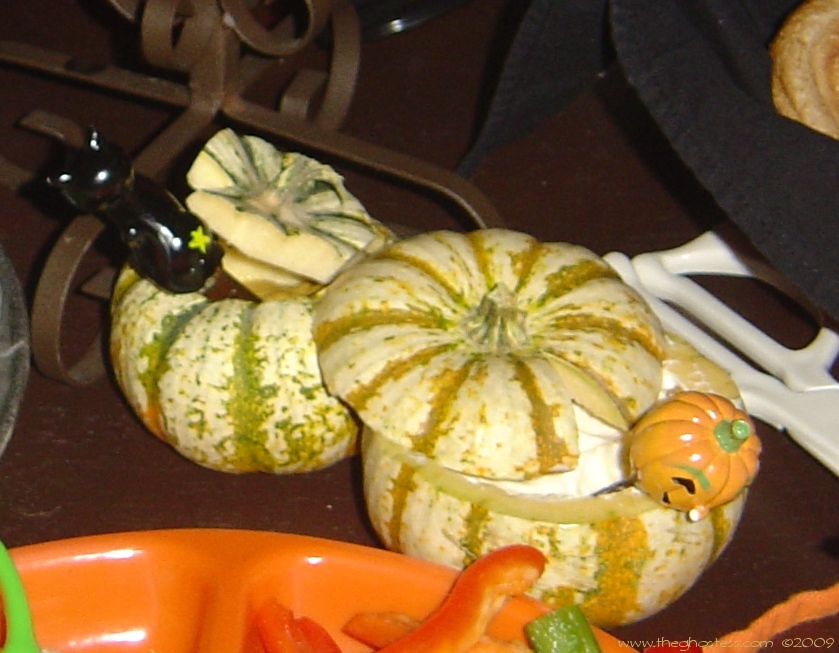
I also like to use the small mini pumpkins for holding condiments like mayo, mustard, dips, sauces and things like that. I just carve them out like I would a big pumpkin, leaving a notch in the "lid" and fill them and stick a Halloween themed spreader in them.
|
The meatballls I serve every year are perhaps the most simple thing to make. I grab a bag of Rosalina's Italian Meatballs from Sam's Club, boil them up, drain, and throw in a bottle of Kraft Honey BBQ sauce. It blends to make a different tasting meatball and I get lots of compliments on them.
|
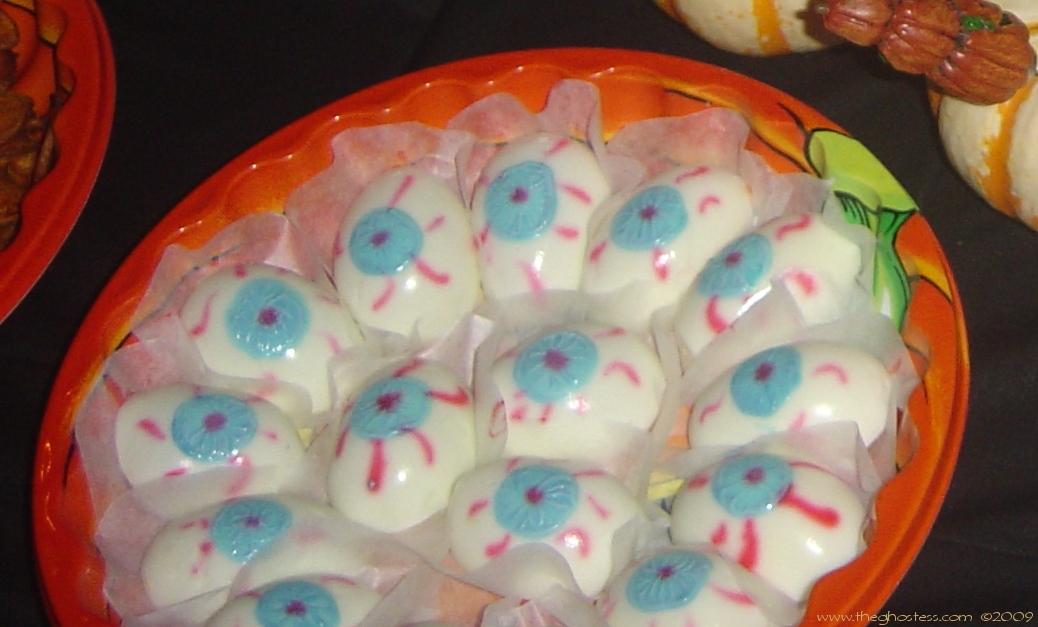
Every year, I make Deviled Egg Eyes. Most people just do the olive eyes, I like to go that extra step and paint the eyes on.
1 dozen eggs mustard mayo pickle relish Boil the eggs for 10 minutes. Peel and cut in half. Remove the yolks and place in a bowl. Mix in mayo, mustard and relish a little at a time to taste. I like to use a cake mixer to blend it and make it smoother before adding the relish. Fill the halved whites with the yolk mixture. Turn the eggs halves over onto wax paper circles or cupcake liners. To paint the eyes on, you can either do what I did the first few years and use straight food coloring and a VERY CLEAN artist's detail brush - or you can mix some food coloring with some mayonnaise as I did later on and paint it on with a clean artist's brush. In 2008, I got really lazy and just went the olive eye route:
Same basic recipe, just adding green olive slices to the yolk part and a piece of black olive in the center of the green olive for the pupil. I sprinkled these with a bit of paprika.
|
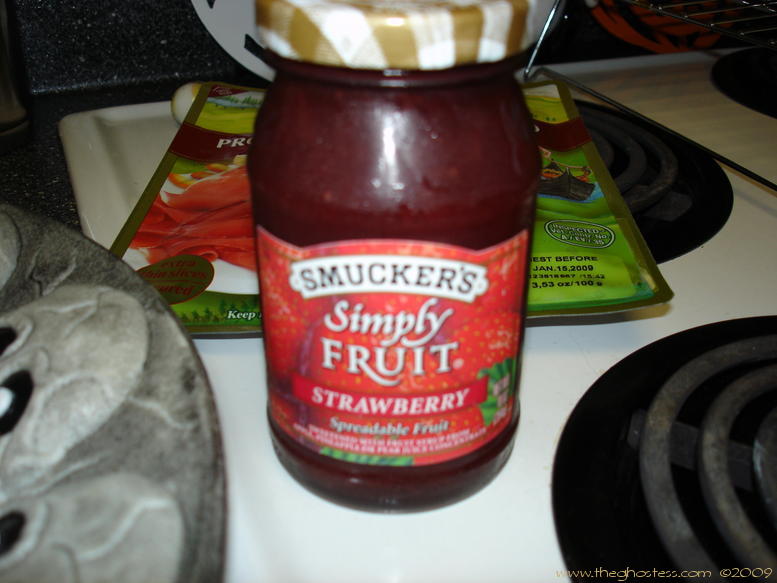
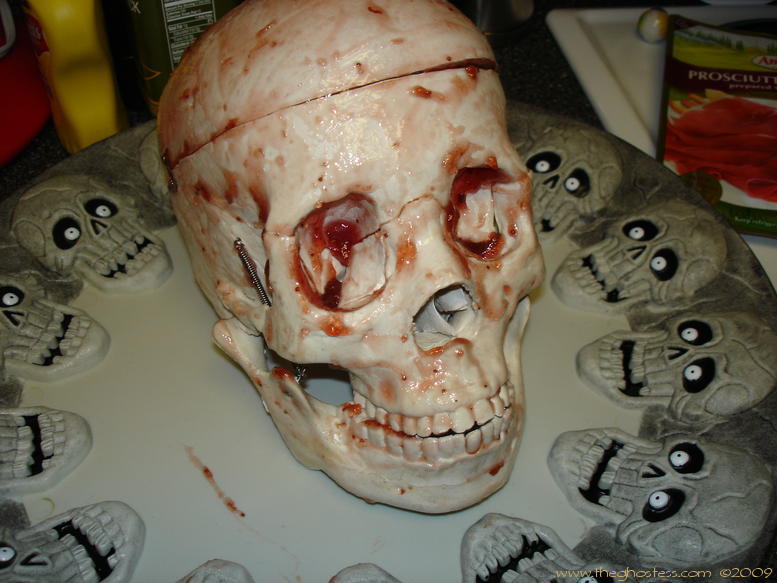
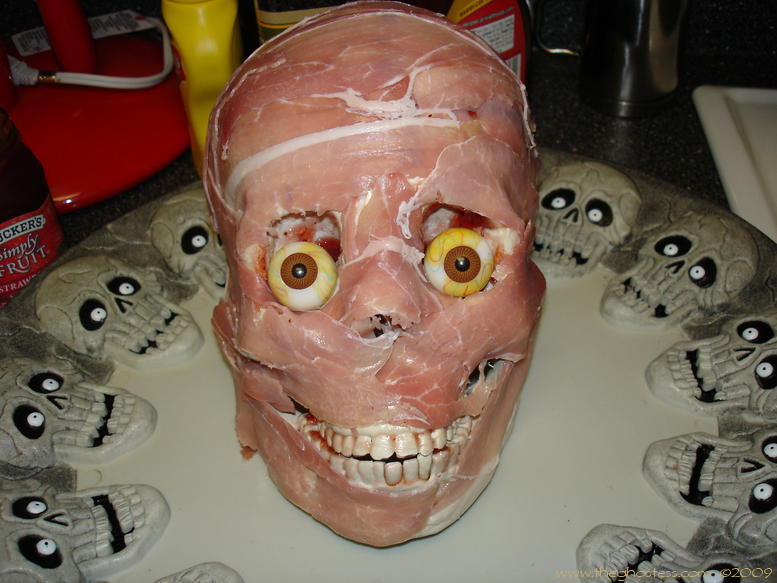
Ham Head or Meat Head The original idea is credited to Andy Oakley, but his page on it is long gone.... this is my version, slightly different but just as good. What you need: A Bucky or other suitable skull ½ pound Prosciutto ham (more or less depending on how much you like the stuff) Raspberry or Strawberry preserves or jam (or any other red colored flavor) Assorted cold cuts and cheeses Plastic eyes or green olives for eyes (optional) 1. WASH the skull - best way to sanitize the skull for use with food is to use a dishwasher. If you don't have a dishwasher, use HOT water and soap and rinse thoroughly. You can also cover the skull in plastic wrap if you are hesitant to use your naked skull.
2. Coat your skull in your preserves or jam. This is to give the meat something to stick to and hold it on to the skull. You can also use thinly sliced Jell-o. I think that's what Andy Oakley's recipe called for. I never cared for the Jell-o version and I find that much like with a Monte Cristo sandwich, rasperry tastes the best with the ham. You don't need a whole lot, just enough to make it sticky. A couple of tablespoons works for me.
3. Now you're ready to dress your skull. I usually get a package or two of whatever Prosciutto that Publix or WalMart's Supercenters carry. If you really care about the quality of yours, you can get it straight from the deli. I don't like Prosciutto all that much,and I find most people won't eat it anyway, so I just get the cheap stuff, as long as it looks good and muscle-y. I just drape the ham over the skull, overlapping the edges for the best coverage. The main idea is to make it look like the skull has been skinned and there is muscle tissue showing. You can reference medical photos for this if you want it to look really realistic. Google is your friend. I had a hard time finding really reddish ham, so this ham head doesn't look as good as it could look.
4. I use a set of plastic eyeballs that I purchased from ACC - which is now handled by skeletonstore.com. It kind of freaks people out more with the eyes seemingly looking at them. I just stick them in the eye sockets. You could also use egg yolks, or green olives with pimentos or black olive pieces in in the center.
5. Now all that's left is to surround your new friend with assorted cold cuts and cheeses, or whatever garnishes you'd like. Since I use a decorative platter for mine, I skip the usual bed of romaine lettuce that I used to use.
|
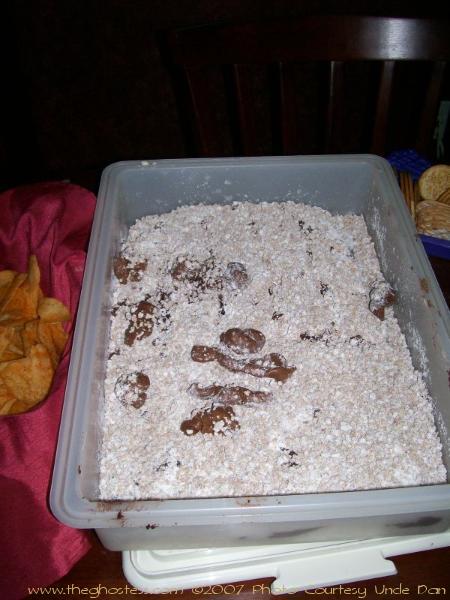
Kitty Litter Brownie Pan There are several different versions of the Kitty Litter dessert on the 'net, from cakes to cookies - this is my version - simple, and tasty - but most people still won't touch it (which leaves more for me!) What you need: Prepared Brownie mix, doubled and baked in at least a 9"X13" pan (I use Ghirardelli Double Chocolate, you can make one from scratch or buy a couple of boxed ones)
Chocolate Frosting (again, you can make your own, it depends on how I'm doing for time, sometimes I like to use ganache but I have been known to use a dark chocolate premixed one)
GrapeNuts Cereal (I use the store brand imitation, it's cheaper and tastes the same) Powdered Sugar (about a half cup or so) Tootsie Rolls (as many as you want) A CLEAN UNUSED kitty litter pan and scooper (I actually use a Tupperware cake tray lid for mine, it's just the right size)
1. Bake your brownie mix and let it cool. Once it's cool, you can cut them into squares and place them in the bottom of the kitty pan, or you can just put the whole thing in there uncut, it's up to you. Frost the top of the brownies. You can skip the frosting altogether if you want, I just like adding more texture to mine. Hot fudge is good on them too. 2. Pour about half the box of cereal into a big ZipLoc bag. Add the powdered sugar and shake it all up so that you coat the cereal well. Set this aside. 3. Now for the fun part - take a Tootsie Roll, unwrap it, and using your CLEAN fingers, smooth it out and pull it out longer. Then smush it back inward so that it looks sectioned like real cat poop. This might take a few tries, but is lots of fun. The kids really get into this part. Make sure to either smooth the ends if you're doing the ball kind or give them a point, like they're fresh from the kitty's behind. Once you get those done, throw them into the bag with the cereal/sugar mix and given them a whirl. 4. Now you can dump the cereal/sugar/Tootsie Poop mixture over the brownie mix in the pan. Spread it out nice and even. We usually add a couple of non-powdered Tootsie Poops on top, for some extra visual fun. That's it! Most people will not eat this, unless you do it first (especially if you actually have cats - we have 4). You can make cat-poop cookies instead of using Tootsie Rolls, or make Ganache or Fondant poops as well. Some people use cake mix for their base. I just really like Ghirardelli Brownies. Enjoy! Halloween is the perfect holiday to try some new spooky-themed cookie recipes too.
|


All information contained on this website www.theghostess.com is provided for FREE, is intended for entertainment purposes and general sharing, and may not be reproduced without express permission from the website owner. If you have been sold information regarding or taken from this website, please contact the admin at the link in the navigation menu. Copyright 1999-2023, The Dead End.