One of the biggest questions I get on most of what I do, is "How did you do that?" So, I took some extra time in taking pictures in 2007 to document some of the things that I get asked about. This page will always be a work in progress, so please excuse the clutter. :) As always, please use some common sense when working with tools and electricity and the like; I'm not responsible for your irresponsibility or stupidity.
************************************

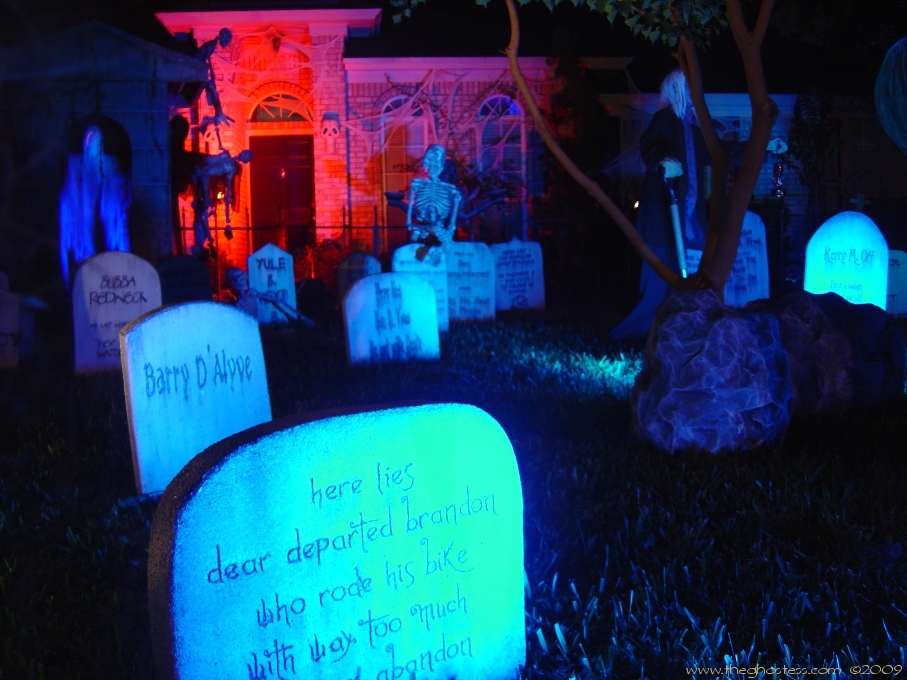
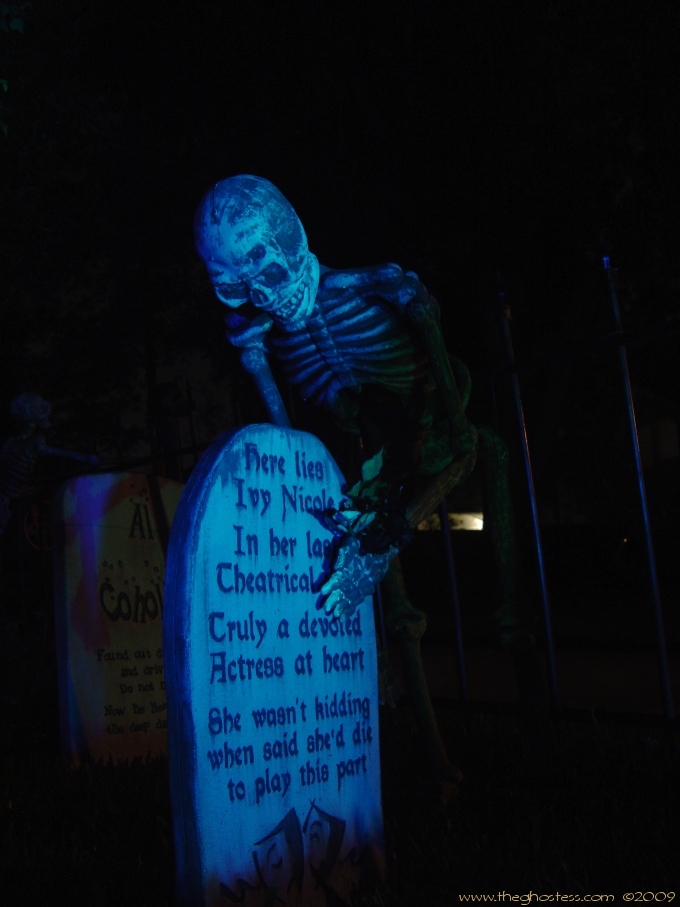
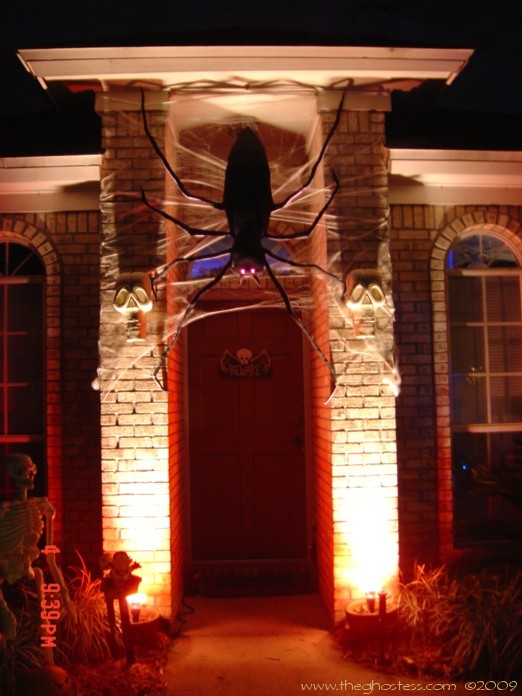
For 2007, probably the biggest question was about lighting. Now, I'm not a lighting expert, but I am an OCD female with a lot of time on my hands. I spent about 4 nights working on lighting outside, moving things around to get the optimal light coverage for my props. Basically, I set up my cemetery with no lighting one day and left it at that until nightfall.
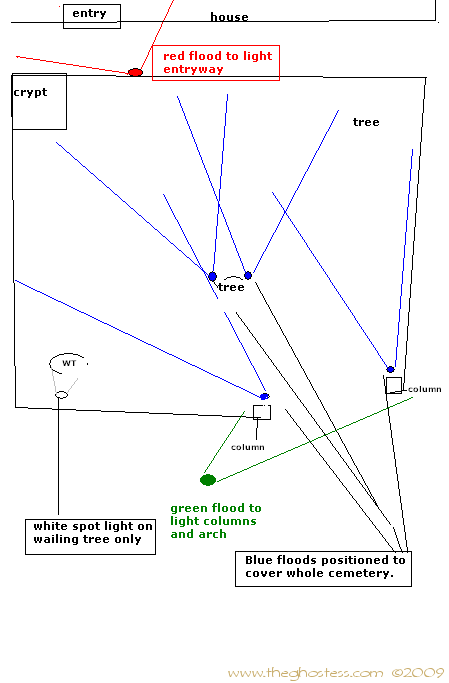
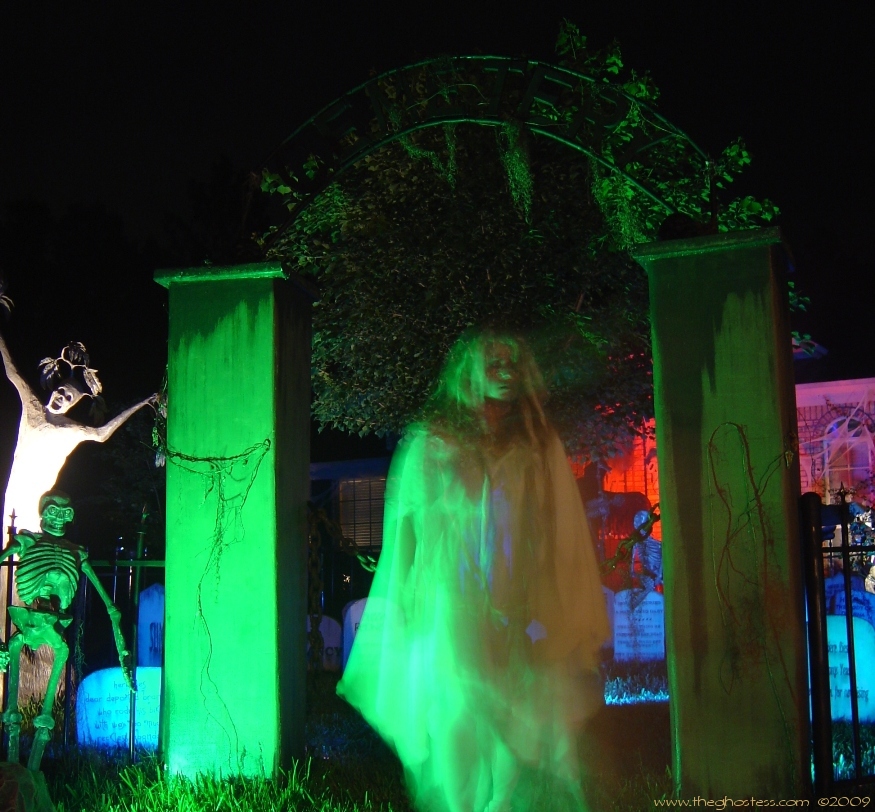
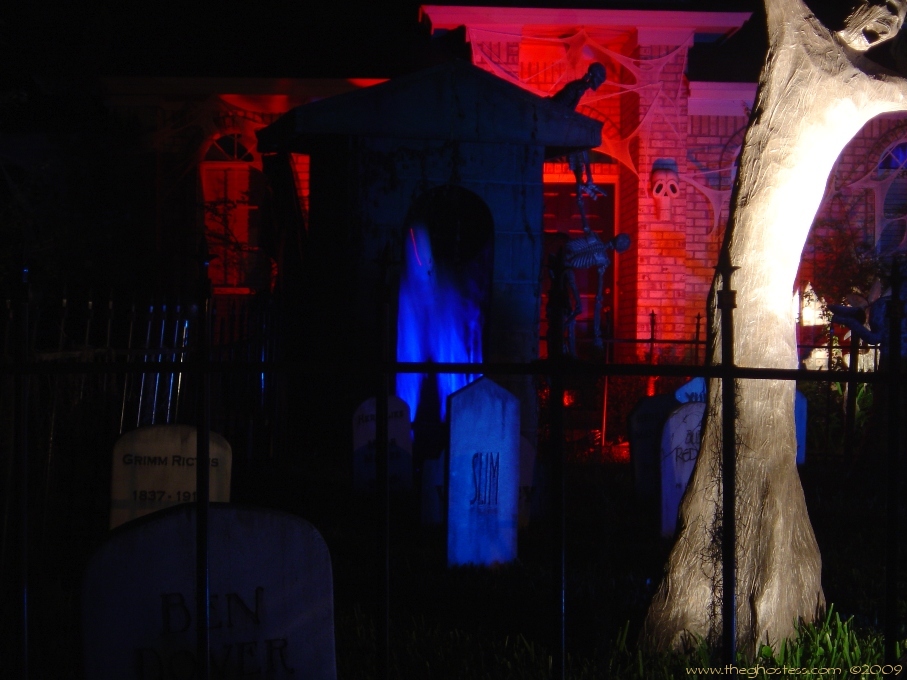
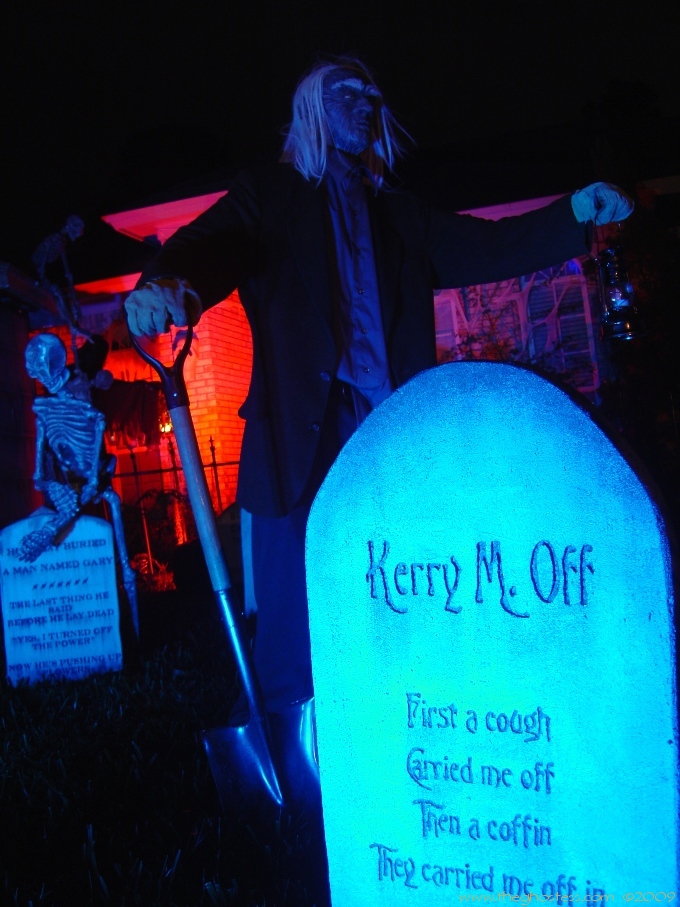
That evening, I grabbed some of my plastic green outdoor light stakes from Big Lots (cost about 4 or 5 bucks each) and some GE/Philips 100W colored floodlight bulbs from Home Depot. I wanted to steer away from the multicolored cemetery as seen in previous years, and go with a more uniform "moonlit" blue hue for the bulk of the cemetery. I used four blue flood lights to do this. I just set them up in the front of the cemetery, with 2 of them at the fence columns, and two further into the cemetery next to a tree. The ones at the tree were hidden with some fake rocks I made earlier in the year.
|
See, VERY simple stuff here! |
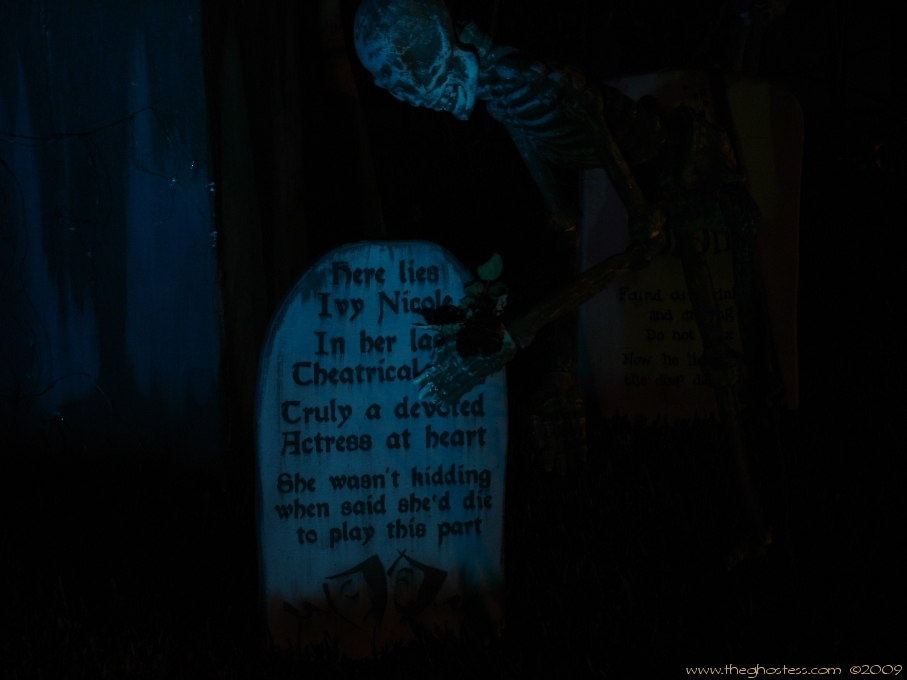
Once I set up the lights to cover most of the cemetery space, I then had to move stuff around in the space to get the most out of my lighting. This meant moving around almost every single tombstone over the course of 4 nights until I was happy. (Enter the OCD part) I tried to use my best looking tombstones in the front of the display, since they were the most visible; plus I worked in the smallest ones, since they cast the smallest shadows, hence letting more light travel to the back of the cemetery.
|
Best stuff in front, biggest stuff in back... and fake rocks to hide the lights! |
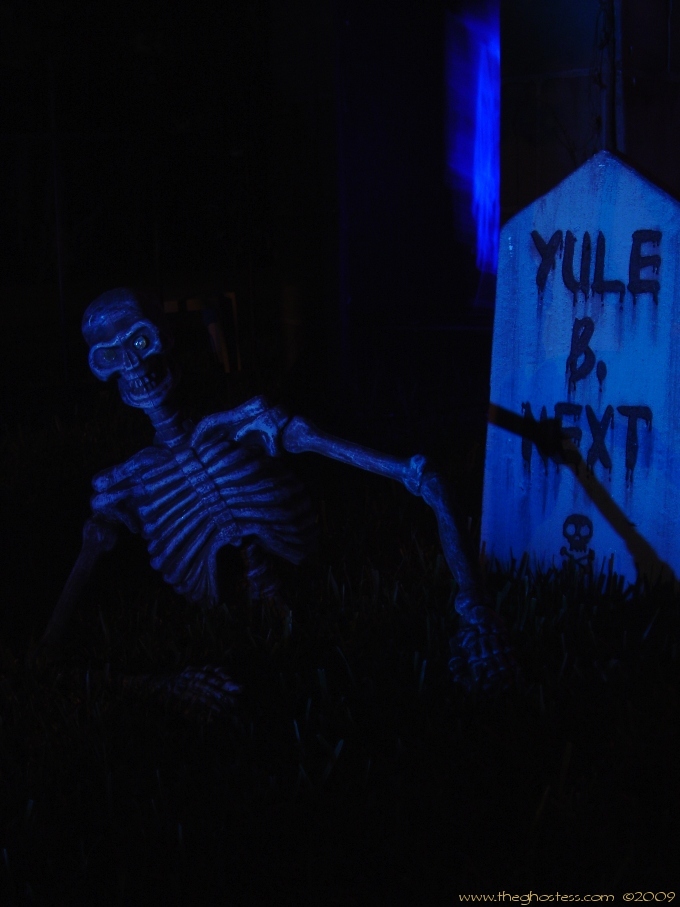
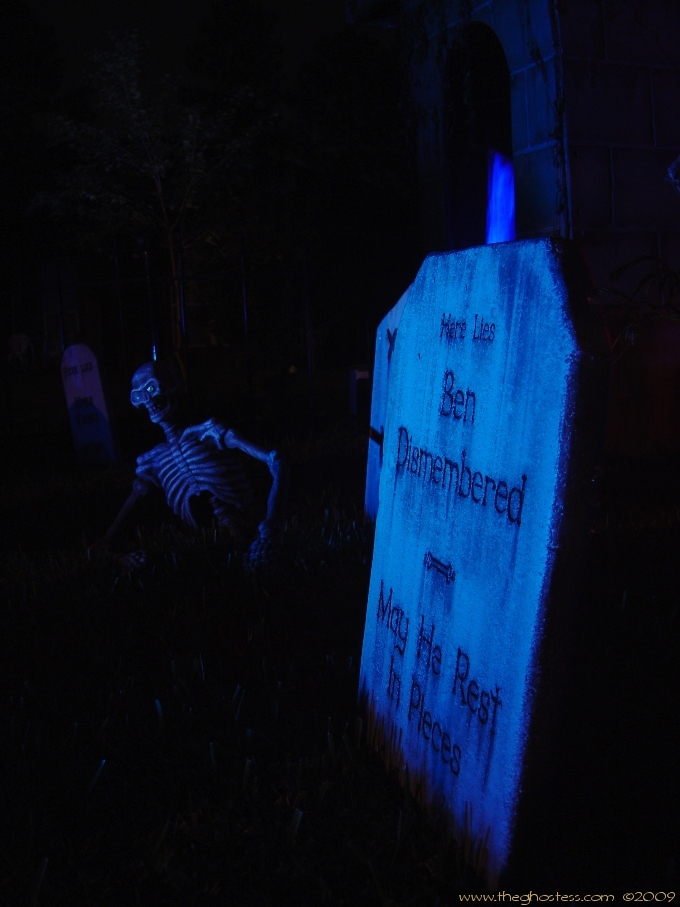
Once I moved all the tombstones around, I added the Bluckies, which caused more moving around. Adding the Gravedigger was fairly easy, I just stuck him in the middle, then moved a tombstone that was behind him. So, you see, basically I just moved stuff around a lot.
|
Behold my awesome Paint skills! Quick and dirty light scheme for the yard. Simple, see? |
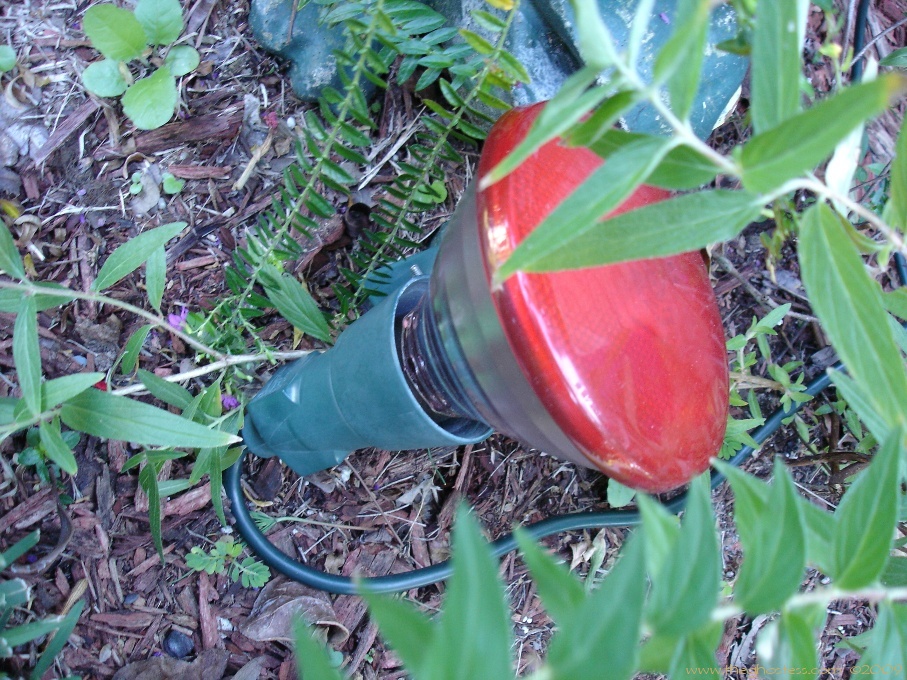
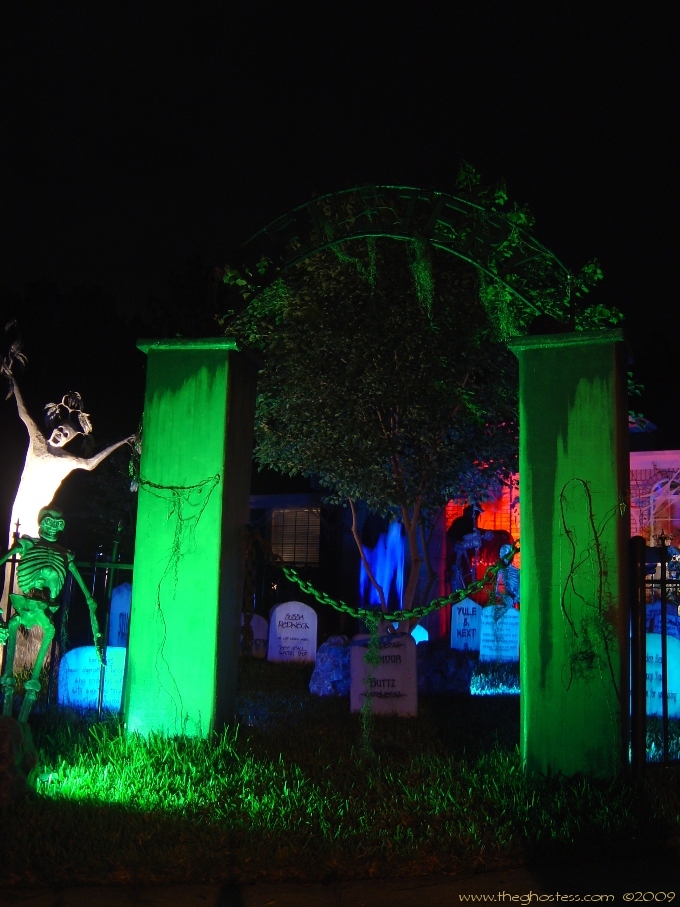
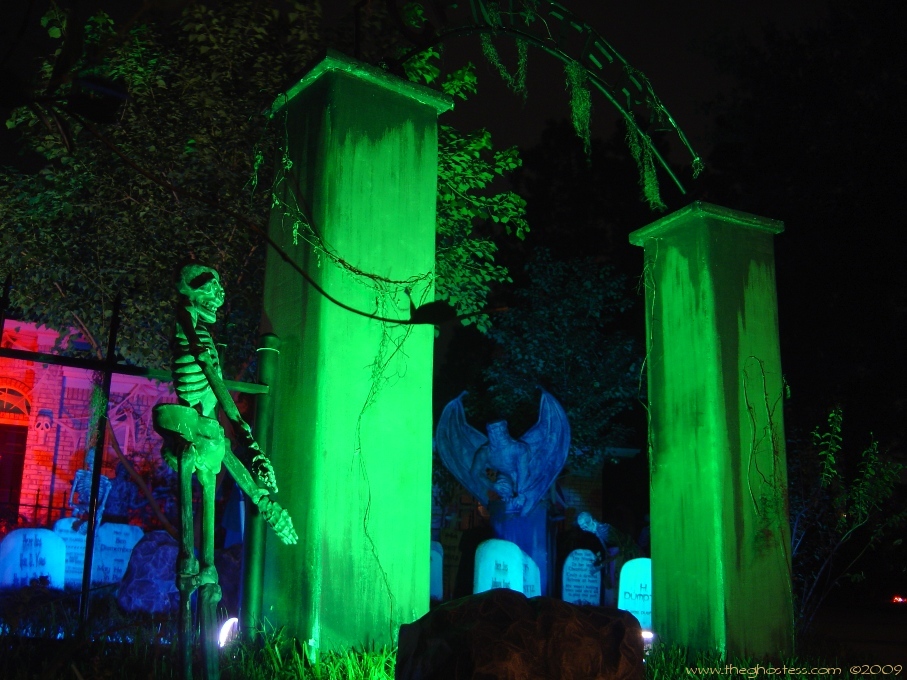
I used one green flood to light the cemetery columns and arch at an angle (because of the driveway and street being RIGHT there) and one clear spot to light up the Wailing Tree. I just didn't like the Tree with color on it, and the white looked cool. For the red light, I just used one red flood light and positioned it toward the entryway at an angle so it wasn't shining right in the front door and still lit up Uncle Rob and behind the crypt.
There ya have it! Unbelievably simple. When the trees in my yard get bigger, which should happen fast, those suckers are SUPER fast growers, I want to attach the blue lights up into them to give a better moonlight shine from above, rather than from ground level. Having light come from above not only causes less shadowing from the props, but also will keep my guests from being blinded when they turn and walk along the sidewalk by the house. I believe I can accomplish this next year. I also was thinking of having lights come from the top of the columns to shine downward as well. We'll see...
******************************************************************************

Taking really great nighttime pictures is not difficult at all, and you do not need an expensive camera to do it with either. For example, we have a really nice (expensive!) Sony a100 SLR digital camera, but I didn't use it at all for my night shots. First of all, I am lazy. I still haven't read the instruction manual for it yet. I'm sure it's really very simple and easy to use as our less expensive Sony cameras, but I just didn't feel like fooling with it this year.
For all of my pictures that were taken at night, without a flash, I use one of two Sony digital cameras: The Sony Cybershot DSC-P92 (older from 2003 camera) and the newer version of it, the DSC-W1 which is circa 2005 I think. My preference is the older one, mainly because I'm more comfortable with all the buttons and stuff in the dark, I don't need a flashlight to see what I'm doing with the camera to change any settings. Honestly, I believe that most digital cameras these days that are at least 5 megapixels would be great for taking pictures.
The MOST IMPORTANT thing of all when taking night pictures is to use a TRIPOD with your camera!!!!!! They're not expensive to buy and are worth every single cent spent on one. Every fraction of the tiniest movement is picked up by a camera especially during night photos when shutter speeds should be the slowest. Think about it - if you have a pulse, you are MOVING. Case in point: the two pictures below are taken by the same camera, one without a tripod (LEFT), and one with (RIGHT).
|
|
|
|
HUGE difference in clarity, huh? |
|
Another important feature to have on your camera is a timer or a remote. I use the timer to take all of the non-flash pictures because again, the camera will pick up any movement, including you pushing the button to take the picture. I don't know about y'all, but I am not the most steady person in the world, so this is really a big thing for me. Sometimes, when you don't even realize it, you still move a camera that's on a tripod when you push the button. Just trust me on this. ;)
On my cameras, there is a button or menu selection for taking night pictures with no flash. The icon for this setting is a crescent moon for all 3 cameras. The "candlelight" function (icon is a candle) is also good for low-light pictures. I think both of those settings automatically add red-eye reduction as well as slowing shutter speed and turning off the flash. There is another setting on there that should NOT be confused with the others, and that's the one for taking pictures of people under low light and is called "Slow Synchro". On my cameras, it has a person with a crescent moon and the camera screen will say "SL" by the flash. NOT a good setting. The flash will go off, the shutter speed with be slow and you will end up with a bright and yellow picture. You do not want a flash at ALL.
A really cool way to get some neat ghostly pictures with both crisp background and props but with a ghostly blur of a person is to use the night feature and while the shutter is open, move around in front of what you're taking a picture of. I learned this while taking a picture of myself in front of my cemetery columns. I set the timer, stood in place, then moved off and the camera caught this and I got a great shot.
|
|
Also, anything else moving in your pictures will be a blur, such as FCGs or other automated props.
|
|
I think a lot of the key to taking any picture well is perspective too. I try to get some normal shots of stuff, then go back and take pictures of the same things from a different angle or height. Usually, I prefer the later shots over the straight on ones.
|
|
|
|
Gravedigger, Ernster Graber |
|
|
|
|
|
Columns and arch |
|
|
|
|
|
Mourner, for some reason just looks creepier on the right to me. |
|
|
|
|
|
Ground breaker Blucky, I prefer the picture on the right, even though he's further away in it |
|
|
|
|
|
You can really see the difference in the pictures from the 35mm film camera on the left (2002), and the digital on the right (2003). |
|
That's pretty much it as far as how I get my pics to turn out fairly decent. It just takes some practice with your camera. When I was taking pictures with a 35mm regular film camera, I had the crappiest pics ever. Just upgrading to a digital made a huge difference because I could see instantly what I needed to go back and retake.
Hope this helps out those who had any questions!! :)
**********************************************************************************
|
I get lots of emails asking how I do certain things when I make props such as painting, weathering, working with papier mache', etc... and it's hard to explain some things using just words and still pictures, so I decided to start a page with some videos showing various techniques I have used. Hopefully these will be helpful to somebody.
So far, I only have one done. As I work on other projects, I'll post more videos. |
|
|
I put together a little video on faux mildew painting. I had several people ask me how I got the streaks of dirty looking grime down my columns and crypt, so I figured I'd start there. This is actually the base of Goliath that I'm repainting. |
|
Below is an assortment of little things that people ask me about each year.
|
|
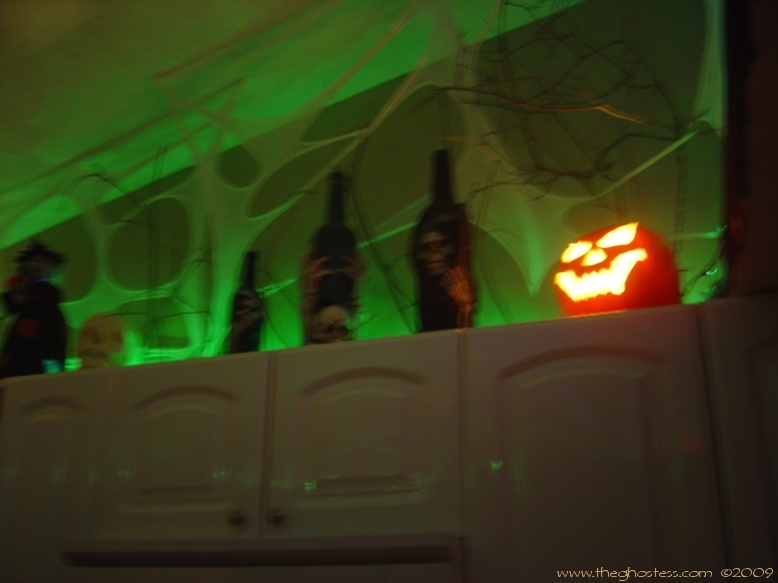
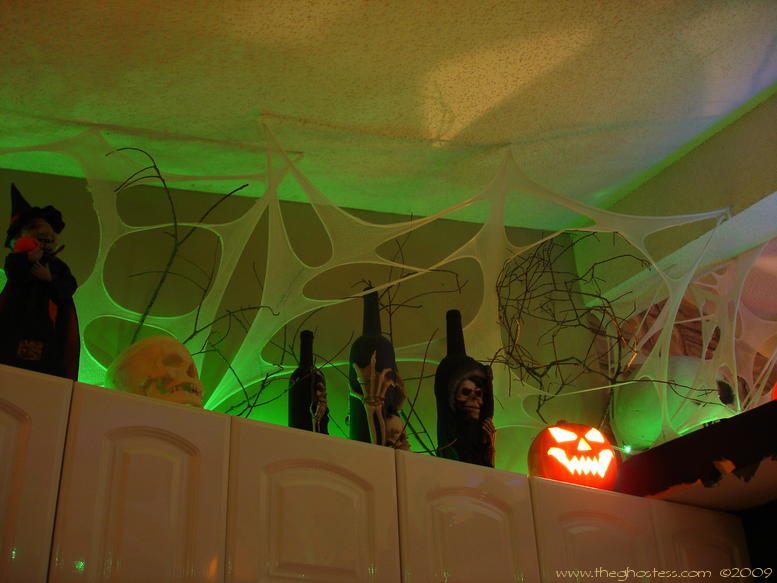
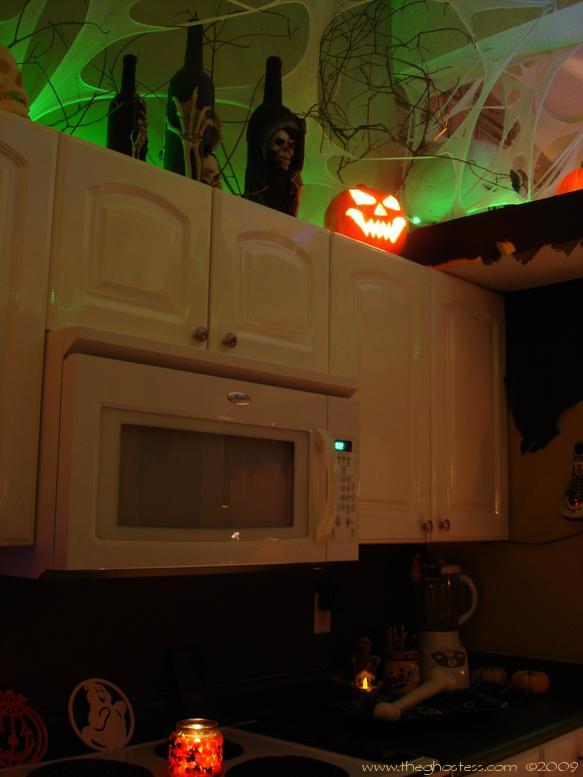
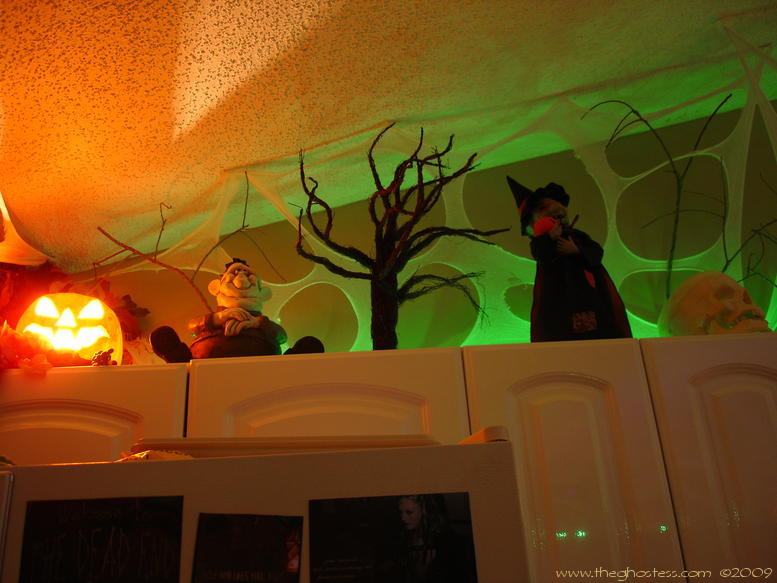
I'll start off with a little bit of the lighting from the inside of the house. The main thing I get asked about is the lighting above my kitchen. I liked the way the green string lights looked inside the cauldron, and how they cast a nice green glow on the little ficus trees in my breakfast nook during that other holiday, so I figured they'd cast a nice green glow on the beef netting webs I had over the kitchen cabinets. So I set about running a string or two over the plant ledge and the tops of the cabinets, in addition to all the light up foam JoLs, black light sticks, and other things I keep up there.
So that I end up with this:
Whereas the years prior, this is what I had up there above the kitchen:
The green lights really made the webbing stand out more. I got a lot of compliments on it when the lights went out in the kitchen when the food was all done.
|
|
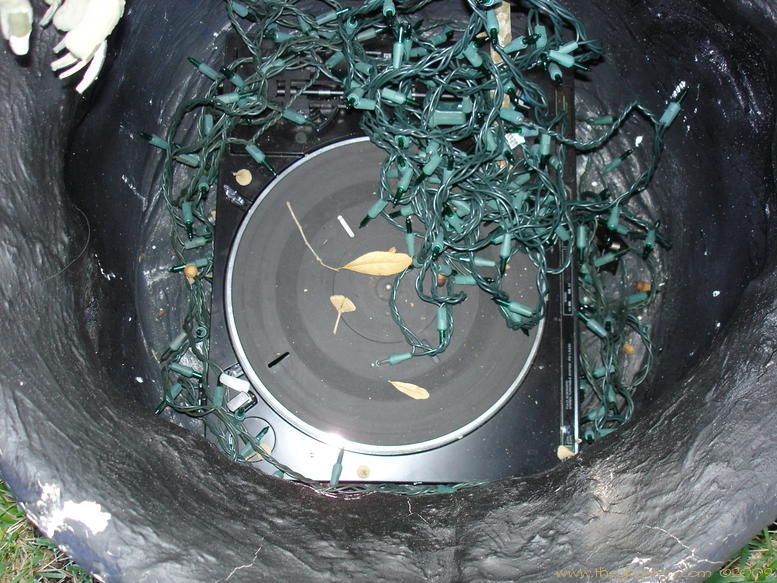
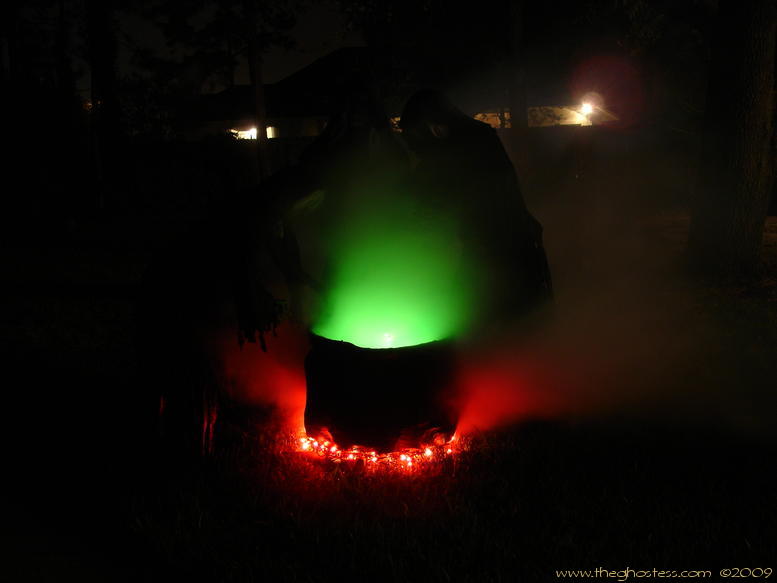
My cauldron gets the same green string lights inside it. Disregard the mess inside in this picture, I keep the lights off the turntable during use for the witches. I make sure the lights are surrounding the edges of the bottom of the cauldron so as not to get tangled up in the stirring. When the fog gets piped through the cauldron, the green from the lights makes it all glow really nicely.
I use the same method for creating the fake "fire" under the cauldron. Red string lights, two strands of them - one twinkling, one steady burning. I add some quilt batting that I've dusted with black spray paint to simulate ashes and the lights coming through it creates the look of embers. Throw in some sticks and you've got a nice little fire. Be very careful to give the lights plenty of space to "breathe" though, you don't want them to over heat and cause a real fire. Be very careful if you're using a fog machine around the light strands as well. In 2007, we had a problem when my husband started up the fog machine and the metal outlet for the fog was touching the light wires and the whole mess shorted out. I had to locate more string lights and get them situated in a hurry.
|
|
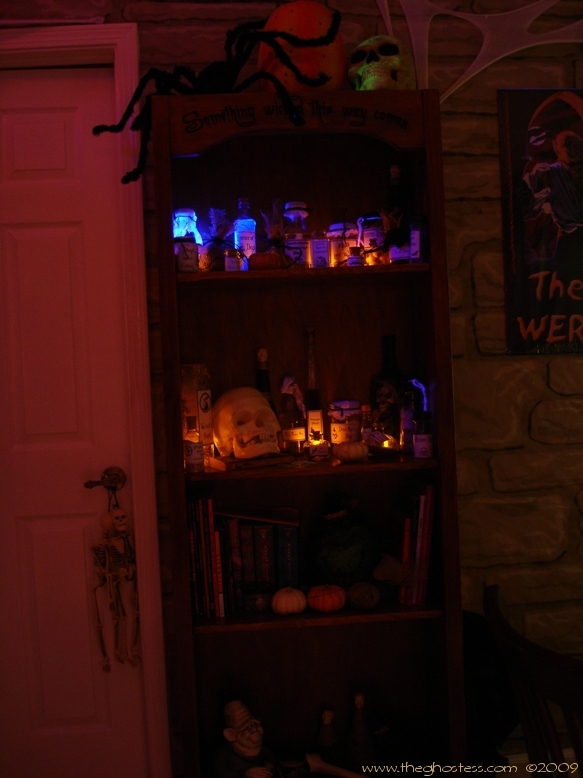
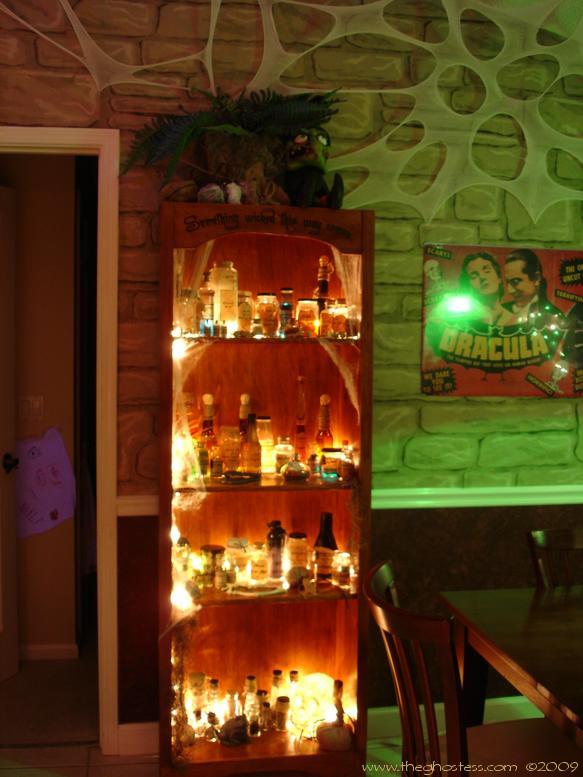
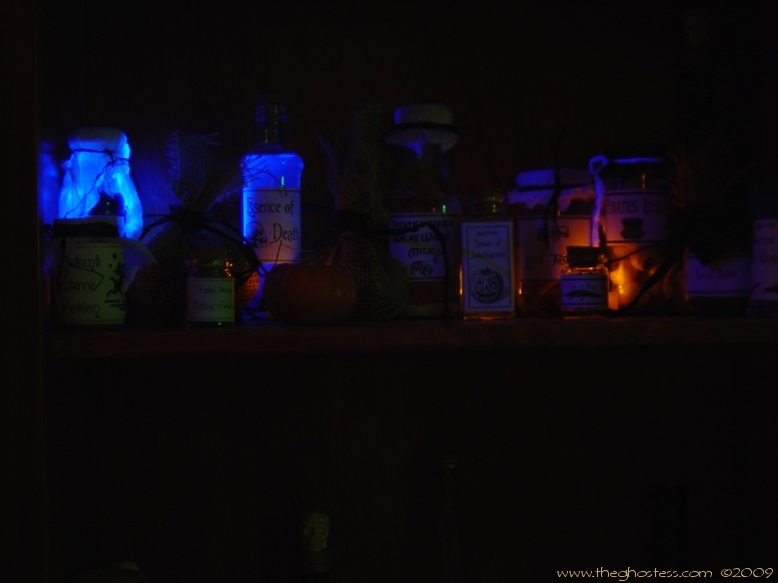
I used plain clear (or "white") string lights to illuminate my witch bookshelf in 2007 as well. I just taped the string lights to the inside edge of the bookshelf and then ran the lights behind the jars to light everything up from behind. It really made everything stand out better. I also had a couple of handheld battery-operated black light tubes behind a couple of the bottles that I knew would glow really well. You can see a marked difference between 2006 (left) and 2007 (right).
|
|
BURNING PAPER EDGES Something that I had a hard time with the first time I made my own custom invitations was burning the edges of the paper. I'd either burn it too much, or I'd end up ruining it by not putting out the still smoldering parts or I'd just plain burn myself. Since then, I've sort of gotten a little method of getting it done quickly, without making much of a mess or burning myself. I threw together a short video while making the invitation tags for 2008's party for those who might need a little help with doing this. It's not all professional or anything, it's just my way of doing it. YMMV.
|
|
More coming soon!!
**********************************************************************************
![]()