
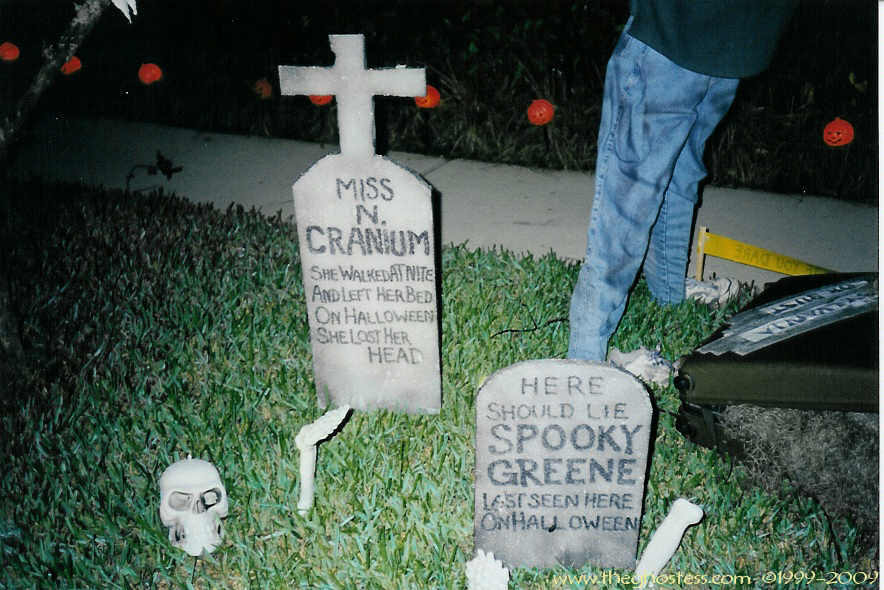
A little history on how my tombstones have changed over the years.... My very first foam tombstones were made from that crumbly white floral foam that they make flower arrangements for weddings and funerals with - those 1'X 2' X 2" flaky sections that are a huge pain to work with. I used a Sharpie to "push" in the lettering while giving black color and spray painted them (man that stuff hates spray paint!). Hey, I was a newbie, and I didn't know any better. The kids loved them, and that's all that mattered. I finally gave them away to a friend of mine's son a few years ago.
(Click on the images for a larger view)
|
For the first batch of tombstones that I made using insulating foam board, I bought some 4' X 8' sheets of pink insulating foam from Home Depot. They only had the 3/4 inch thickness here in North Eastern Florida, so I glued two sections together with Liquid Nails for Foam. The LN for Foam Board takes a while to dry, and I got very annoyed with it and ended up not making the tombstones that year (2003) since they still hadn't dried after 24 hours with only DAYS before Halloween. I did manage to get them done in 2004 after a year's curing time for the LN for foam.
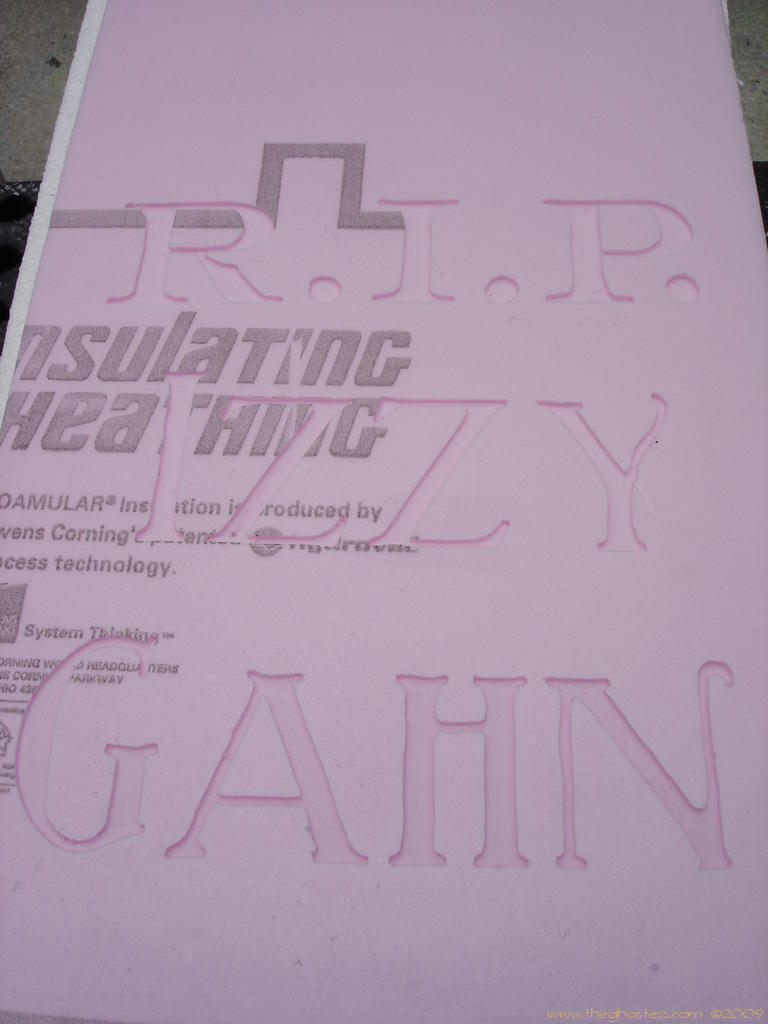
*Now, if you're not up north.. good luck finding this foam in anything thicker that 3/4". How it was explained to me by someone else is basically this - The Owens Corning pink and Dow blue Extruded Polystyrene (EPS) foams are made for the areas that actually HAVE winter and is designed to hold in warmth. The white beaded stuff is for keeping in cold (which is why it's prevalent in the southern states) - think "Ice Chest". |
For the second and third rounds of tombstones that I made, I used the beaded Styrofoam that comes in 4'X8'X2" sheets from Home Depot, but it's softer and a little less favorable for carving than the pink. It was not TOO difficult to work with, although there were some problems with the Dremel catching the beads and tearing the lettering when I tried to do small detail work. The painting on the first coat was somewhat tedious, but mainly because it took so much paint to cover them and get into the small nooks and crannies that come with Styrofoam. They look ALMOST as good as 2004's, but cost half as much to make. 2005 pictured left, 2006 right. In 2006, I started adding sand to the paint to give texture. They turned out VERY well and are much heavier than the rest of the previous years.
|
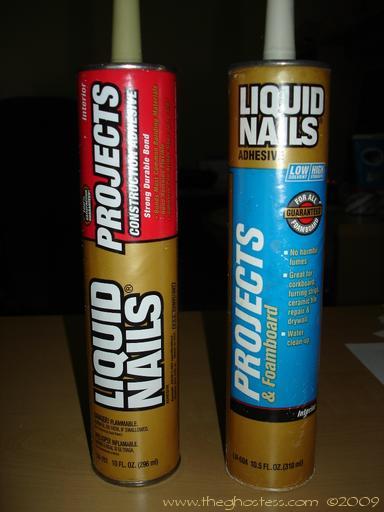
Currently, (in 2008) I started out making just white styro tombstones, but a fellow Florida Haunter, Coda180, brought a couple of his that he made with the white styro AND the pink foam together. The front is the pink and is the carved side; the white gives the tombstone the thickness without having to use more pink. Genius! So now all my future tombstones will be that method. We used Liquid Nails for Projects (pictured LEFT) on those. It dries MUCH quicker than the LN for foam board (pictured RIGHT).
Gorilla Glue and Elmer's less expensive version are both also GREAT for using with foam projects. A little bit goes a long way with these two. One thing I noticed when cutting through the LN for projects and cutting through the Gorilla glue is that the LN didn't "catch" the foam cutter like the Gorilla did. They both seemed to sand equally well.
|
Basically, I just cut the basic size that I wanted for my tombstones out of the white and the pink foam. I used a box cutter to score and snap the foam into rectangles. Then I glued them together with the Liquid Nails and stacked them up, put stuff on top to weigh them down and help cause a good seal while the glue dried. You could also wait to glue them together until after you carve your epitaph; I'm just a creature of habit, so I do it this way.
For epitaphs, I like to use Goblinville.com 's list. They've got some good ones. Here's a list of more sites with epitaphs: http://www.howl2000.com/Epitaphs.html http://www.famousquotes.me.uk/epitaphs/ http://www.insults.net/html/graves/index.html http://www.writing.com/main/handler/item_id/1099422 http://home.wi.rr.com/epitaphs/ http://www.alsirat.com/epitaphs/ http://www.webpanda.com/ponder/epitaphs.htm http://seniors-site.com/funstuff/epitaphs.html http://www.innocentenglish.com/funny-dumb-quotes-questions-sayings/funny-epitaphs.html http://www.digitaldreamdoor.com/pages/quotes/epitaphs.html http://www.mtworld.com/odds%20n%20ends/grave_epitaphs.html
Some funny cartoons with tombstones just for kicks: http://www.cartoonstock.com/directory/e/epitaph.asp
|
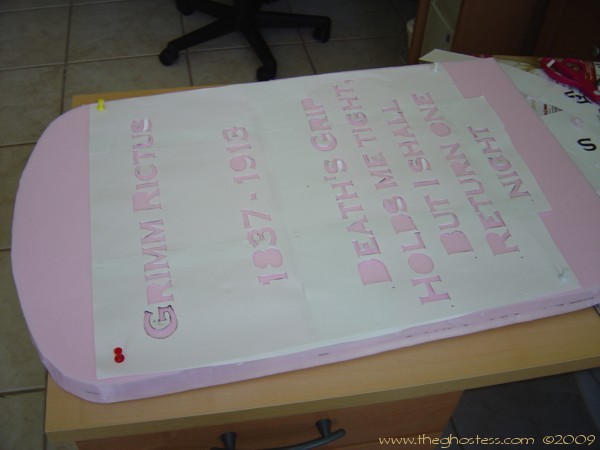
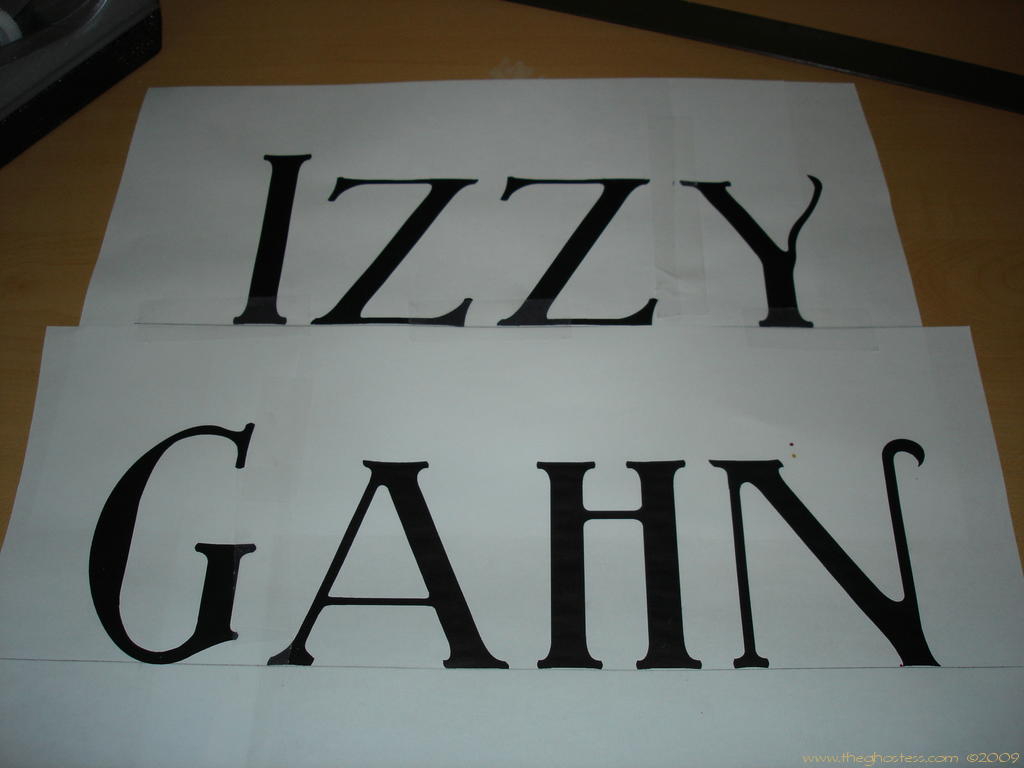
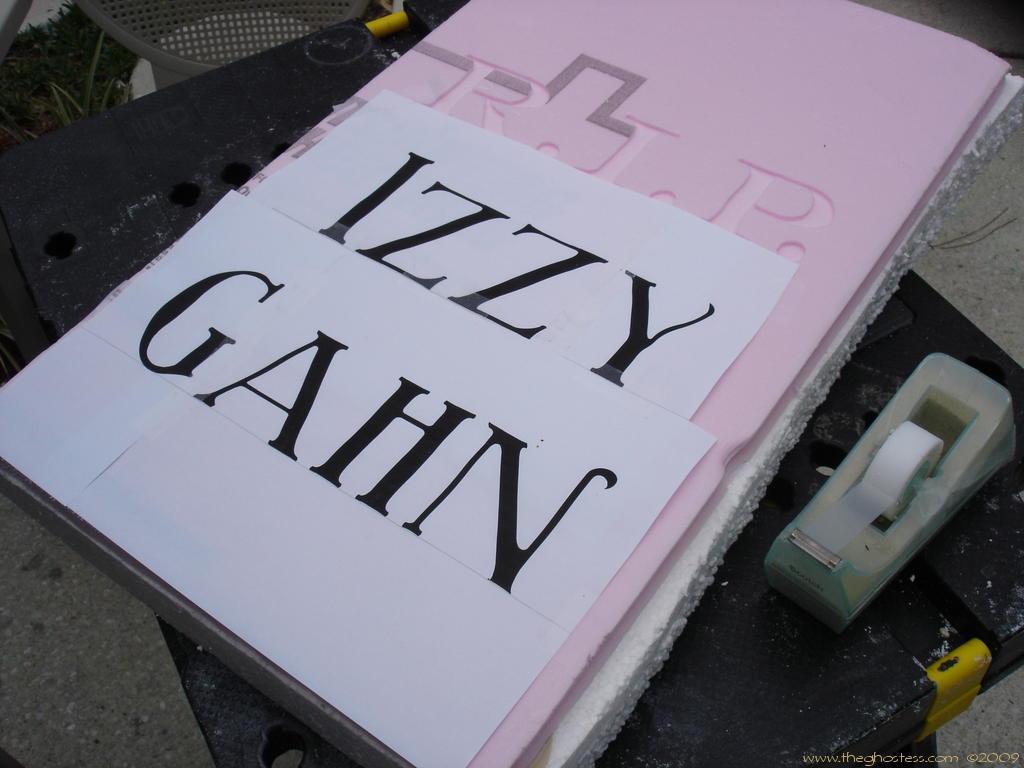
I used Microsoft Office Publisher to create a poster sized template with the font and size I wanted. You could use a number of other programs to create epitaphs like Corel, and even Microsoft Word, or Word Pad. (If you don't know how to go about doing this or don't have the programs, and want to use WordPad which comes with Windows-based systems, check out this page: Creating a template with WordPad) I printed them, laid them out, and taped them together, then set them aside for later.
|
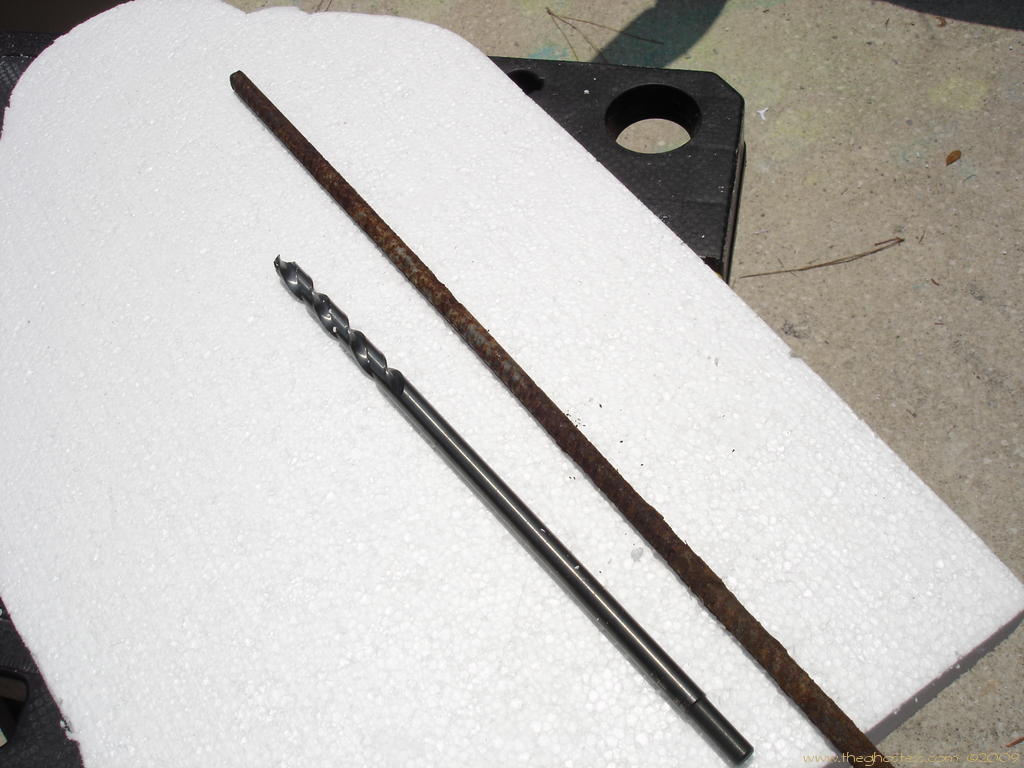
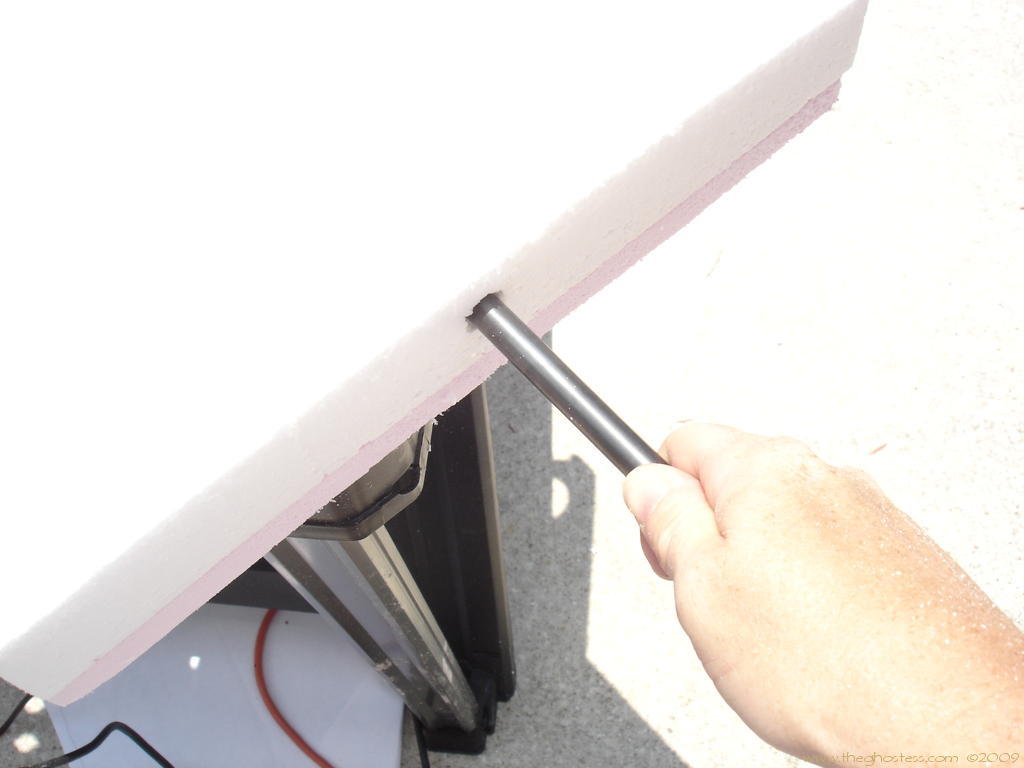
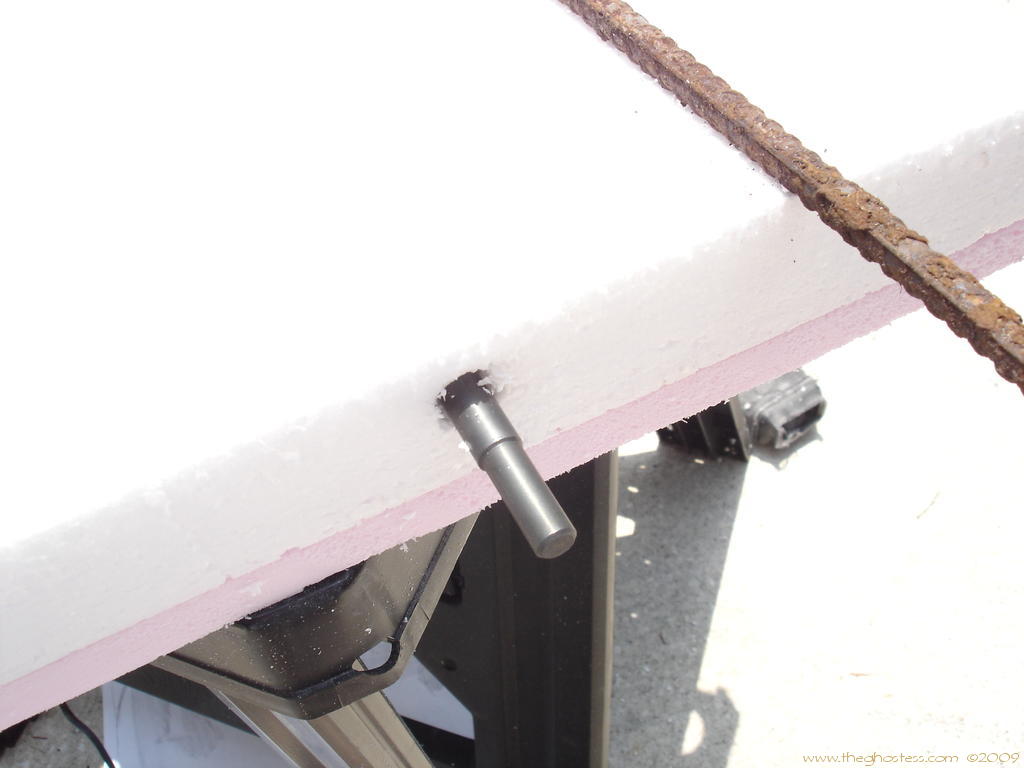
Now, perhaps the most important thing that I learned from Keeba, the Queen of Tombstones, to do before you start getting all artistic, is to drill your holes for your support. The worst thing to happen is to do all that hard work carving, and then poke a hole right through the front of it. I use 1/2" and 3/4" rebar that is 2 feet long for my supports on my tombstones - it's cheap and works great. The first set of insulating foam tombstones that I made, I used PVC encased in the middle of the two glued sections of pink foam. Now, this actually was more of a pain to me to do, and I honestly haven't noticed a difference in having the PVC in them and not having it, so I just skip it altogether. I just take a 1/2" drill bit that's about 12 inches or so long and drill a hole or two depending on the width of the tombstone into the bottom of the foam. I do this by hand now; it's a hard thing to try to accomplish with a powered drill without poking through the front or back of the tombstone. It can be done, I just prefer to work by hand. Drill bit and rebar -I just twist the drill bit by hand until only a little is left sticking out, being careful of the angle it's going in:
When you go to use the rebar with your tombstones for set-up, you simply use a hammer to pound the rebar into the ground far enough for the tombstone to accomodate the rebar, then slide the tombstone over it. You should have a snug fit depending on the size of drill bit and rebar you use.
|
Now that my foam is glued and drilled, let's move on to carving epitaphs. I have my template that I made earlier and I've taped it (or pinned with thumbtacks) to my foam on the pink side, centered to allow for shaping the tombstone.
|
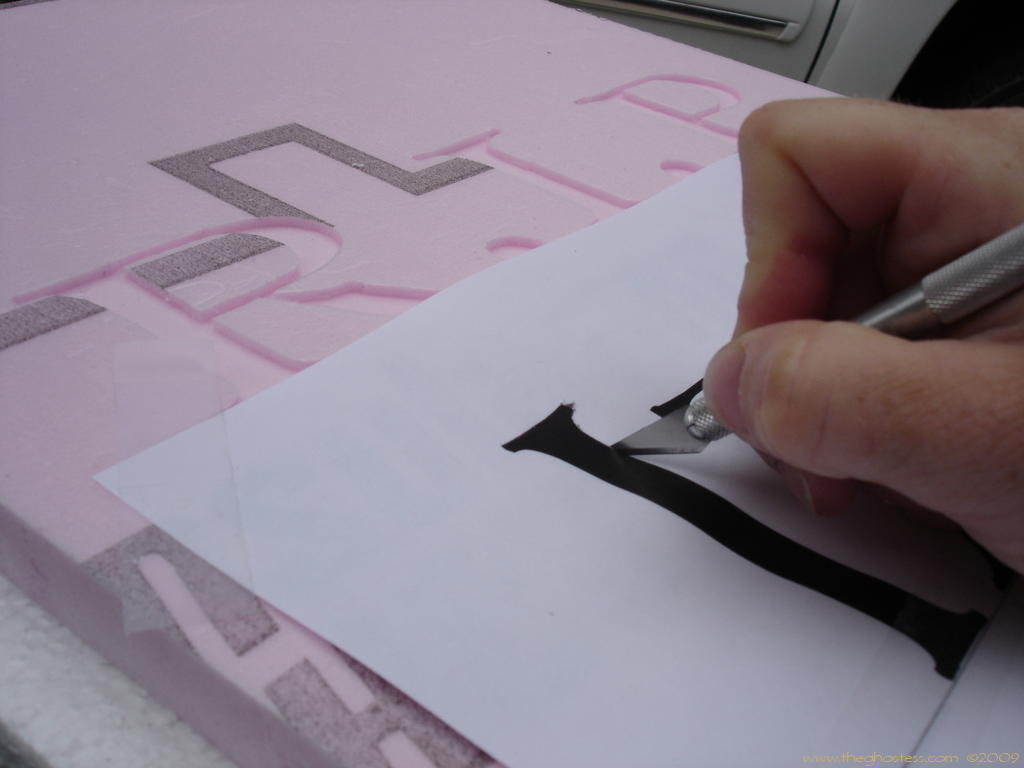
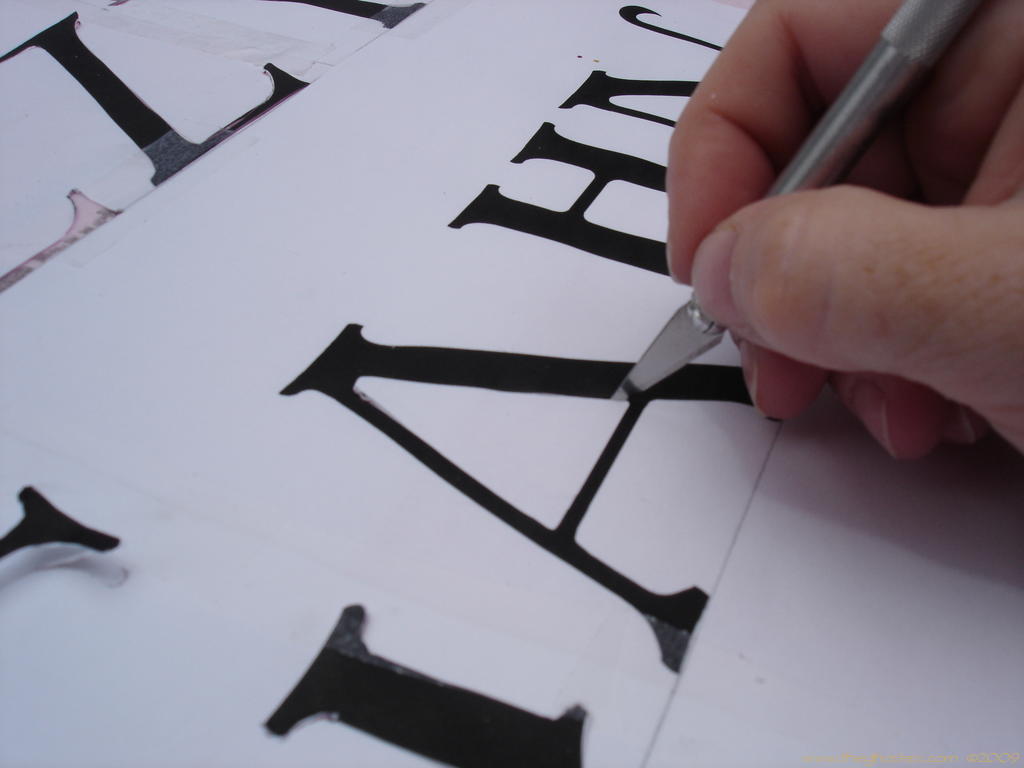
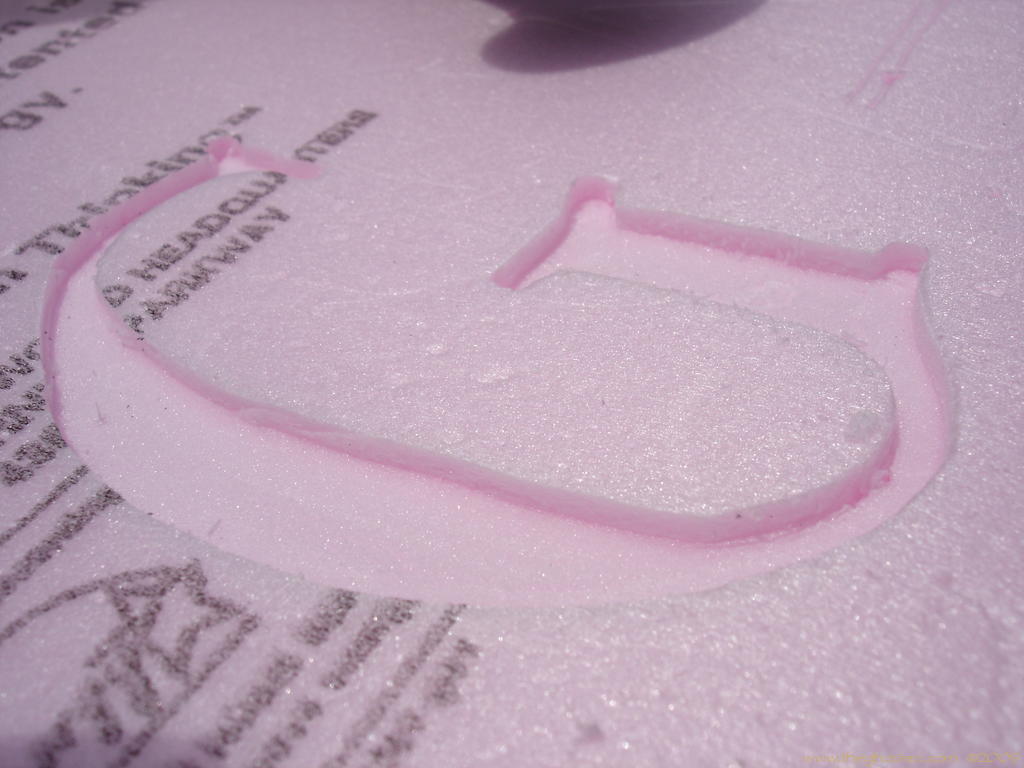
I'm going to use a Xacto knife with a nice sharp fresh blade to cut through the edges of the letters to score the foam under it. I make sure to get the blade deep enough so that I'll have a good line to follow later. If you have letters (pictured right) that have center sections like A, O, P, R, etc... make sure to do the inside cuts first so you don't lose them when you do the outside cuts.
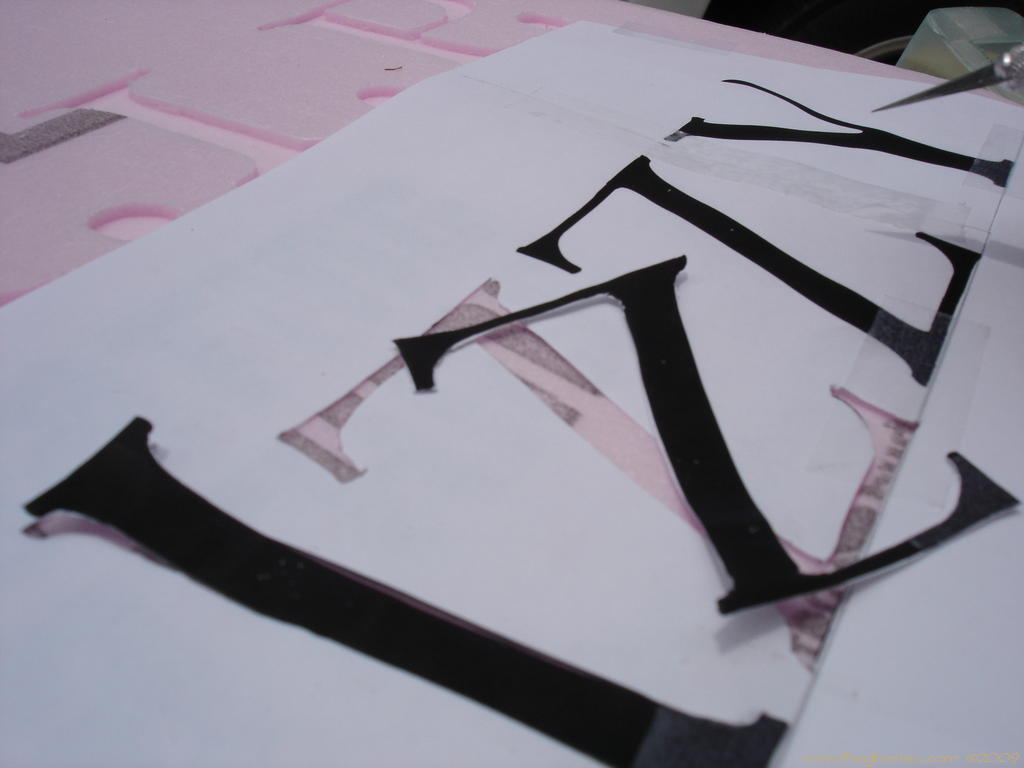
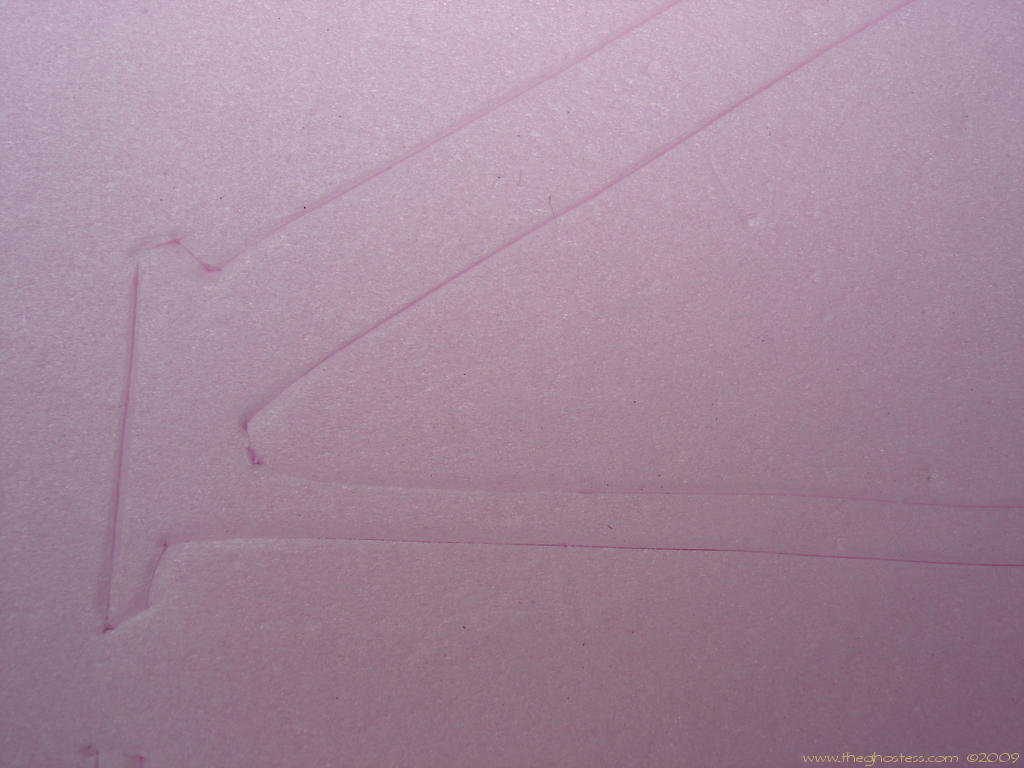
If you've scored it well, you'll end up with visible letters (above right). Scoring it also helps you keep nice crisp lines when you go to carve with a Dremel, as it pulls the foam away from the edges of your cuts, but not past them. You can skip the scoring altogether and use the Dremel right through the paper, but I haven't had good luck myself doing that, so I stick to my little extra step. I get picked on for being a perfectionist like that. :) The first batch of tombstones that I made with the pink foam back in 2004 were carved completely with the Xacto knife by hand. I beveled them and everything. It was very time consuming and rough on my carpal tunnel, but man they look good. If you don't have a Dremel, the Xacto is good as long as you have sharp blades and time. Some people use wood burning tools as well. If you decide to try the wood burning - MAKE SURE TO HAVE PROPER VENTILATION!!! Melting foam releases fumes, and it isn't good for you! Do this outside. Some people also use spray paint to do their lettering. You can create a template and cut the letters out, but leave the main template on the foam and spray over the letters so that the spray paint eats the foam some. Or you can do it the opposite way and make individual letters to put on the tombstones and spray paint over that so that the paint eats away around the letters, but leaves the foam intact where the letters are. Then remove your letters and you have nice raised letters. There are a ton of methods to try, I suggest trying a few and see what works best for you.
|
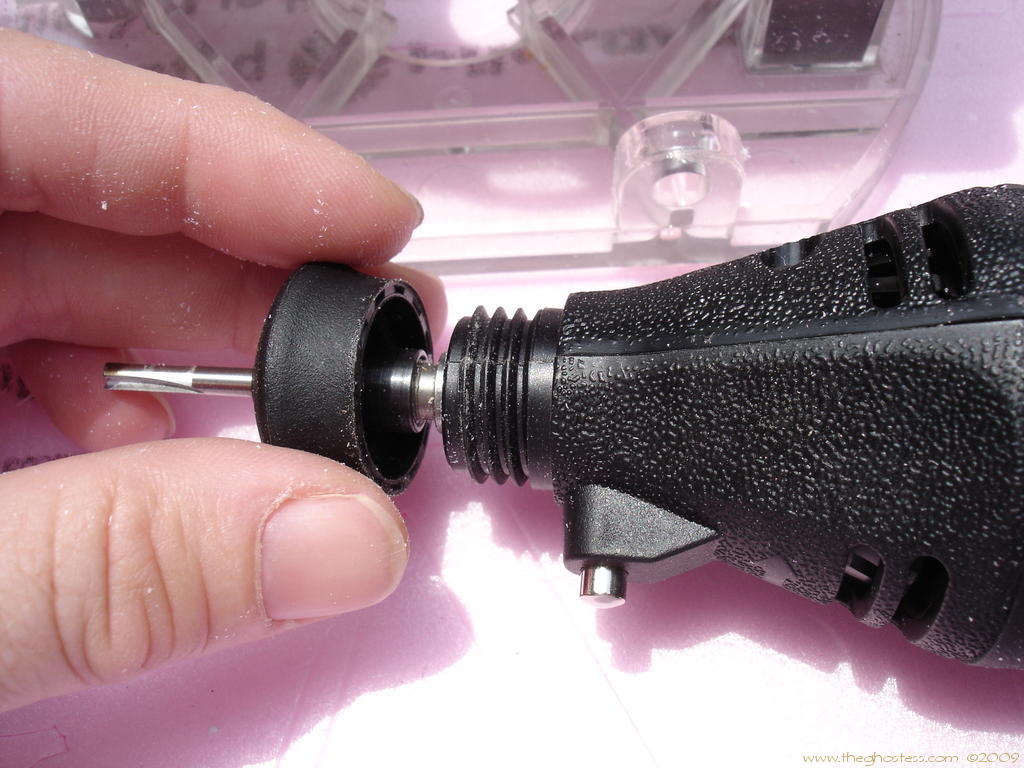
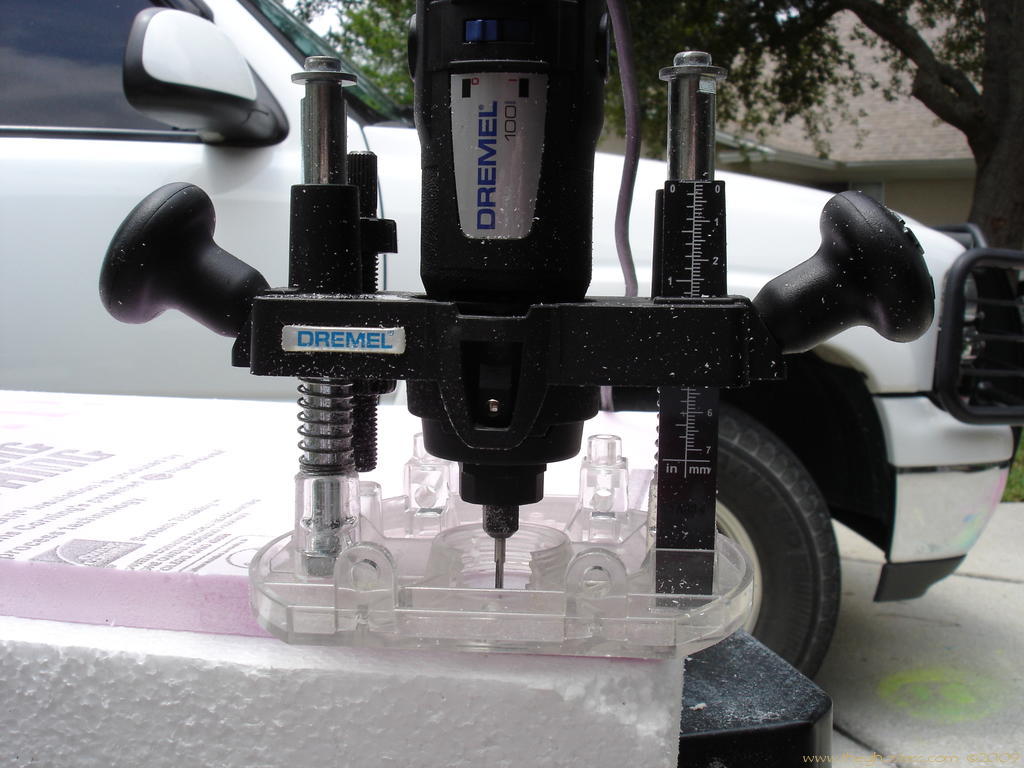
I use several different tips for my carving with the Dremel, depending on the look I'm going for or the size of the text or image I'm trying to carve. Since I'm using a plunge router with my Dremel, I am using the corded Dremel that has the plastic end that screws off. This is so the Dremel can then be screwed into the router attachment for stability.
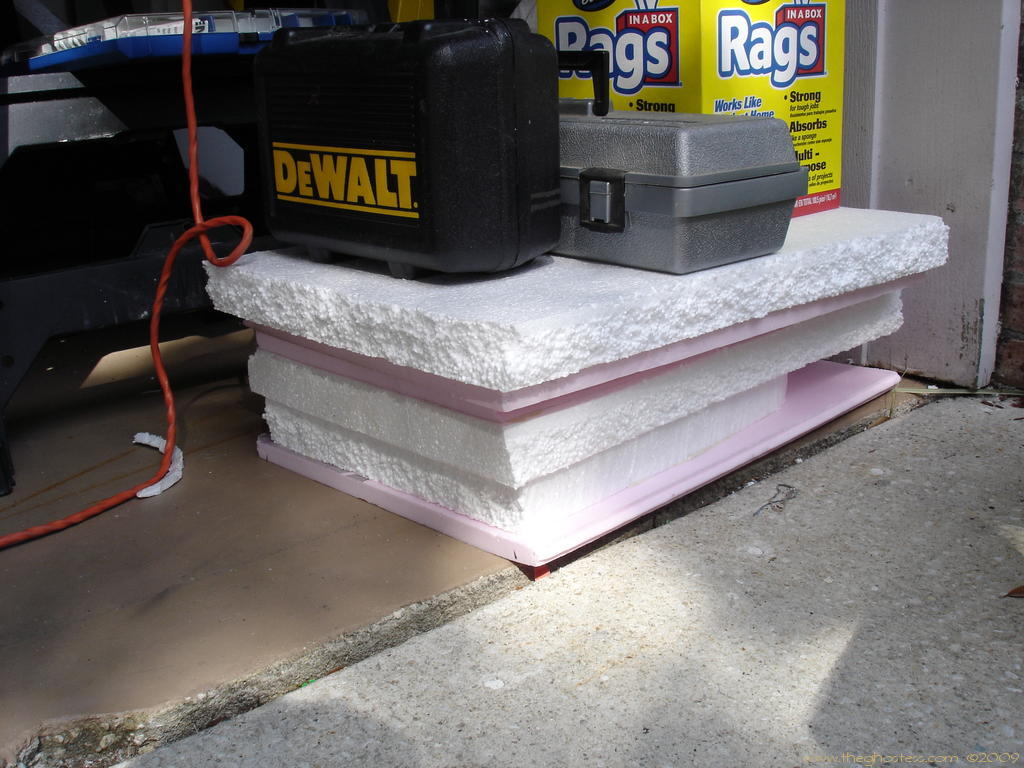
The plunge router can be found at Home Depot, Lowes and other places that carry Dremel products. This one costs about 30 dollars. You can also try to find the smaller and easier to use 230 router attachment from Dremel, but it's been retired from their line-up, so Ebay and other resell areas would be your best bet for finding it. It's much easier to see around and since it is smaller and lighter, it's easier to use for people with smaller hands or with arthritis or carpal tunnel. Special thanks again to Coda180 for bringing his and letting us try it out! I bought one on Ebay for 10 bucks, and it's worth every penny.
|
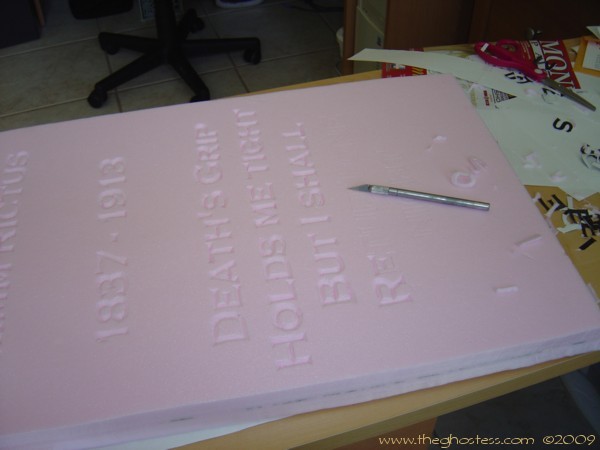
For this particular project, I'm using a straight router bit - mainly because it's the first one I grabbed and it's small enough for what I need. I want to get the right depth for my epitaph, so I set the router at the edge of the foam so that the Dremel bit is just hanging off and adjust my height there. I like mine to be around an 1/8 of an inch deep.
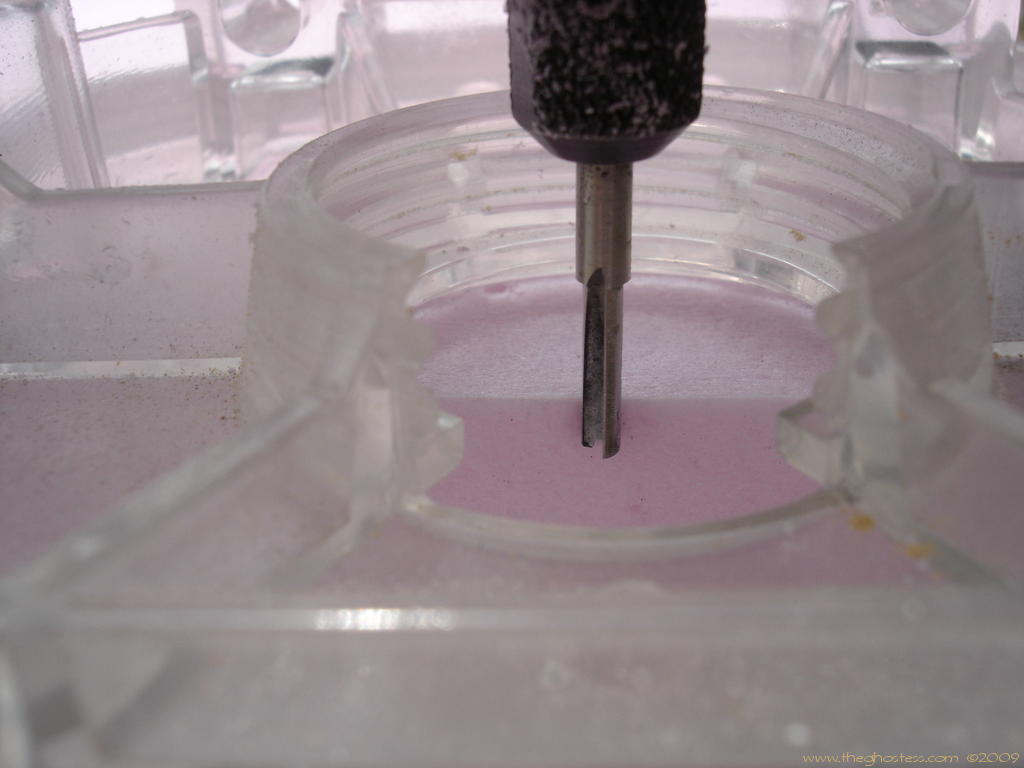
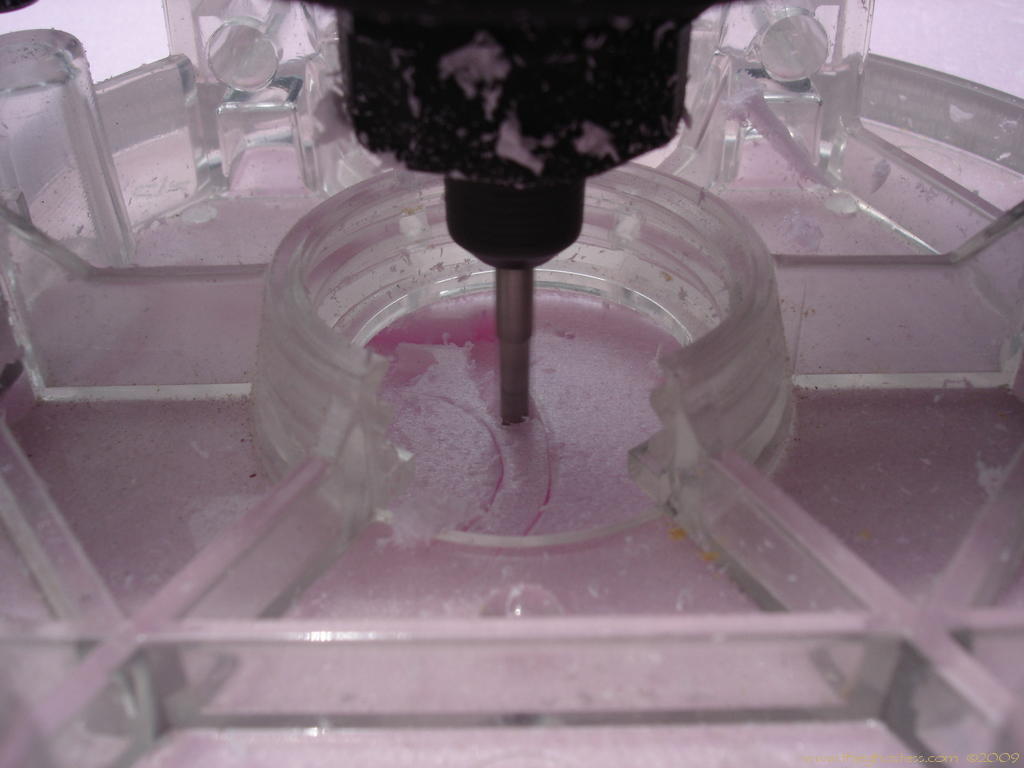
Then I put the Dremel in place over a letter and turn it on, letting the tip sink into the foam and I follow the score lines I made earlier. I try NOT to touch the lines, but to stay just a tiny bit away and let the Dremel pull the foam away from the cut lines. It helps to make sure you know what letter you are working on at all times. I've made "P" into "R" too many times.... Also, don't turn your Dremel on when it's sitting on the foam with the bit touching it unless it's where you want to carve! Again, painful lessons learned from experience. This is a messy job too, so it's something you'll want to wear a mask and goggles for as tiny bits of foam will be flying all over the place. One thing I noticed with the pink foam is that it tends to melt and stick to the Dremel bit if you go too fast or hold it in one place too long. I've not had that problem with the white styrofoam yet.
|
|


All information contained on this website www.theghostess.com is provided for FREE and is intended for entertainment purposes and general sharing. If you have been sold information regarding or taken from this website, please contact the admin at the link in the navigation menu. Copyright 1999-2022, The Dead End.